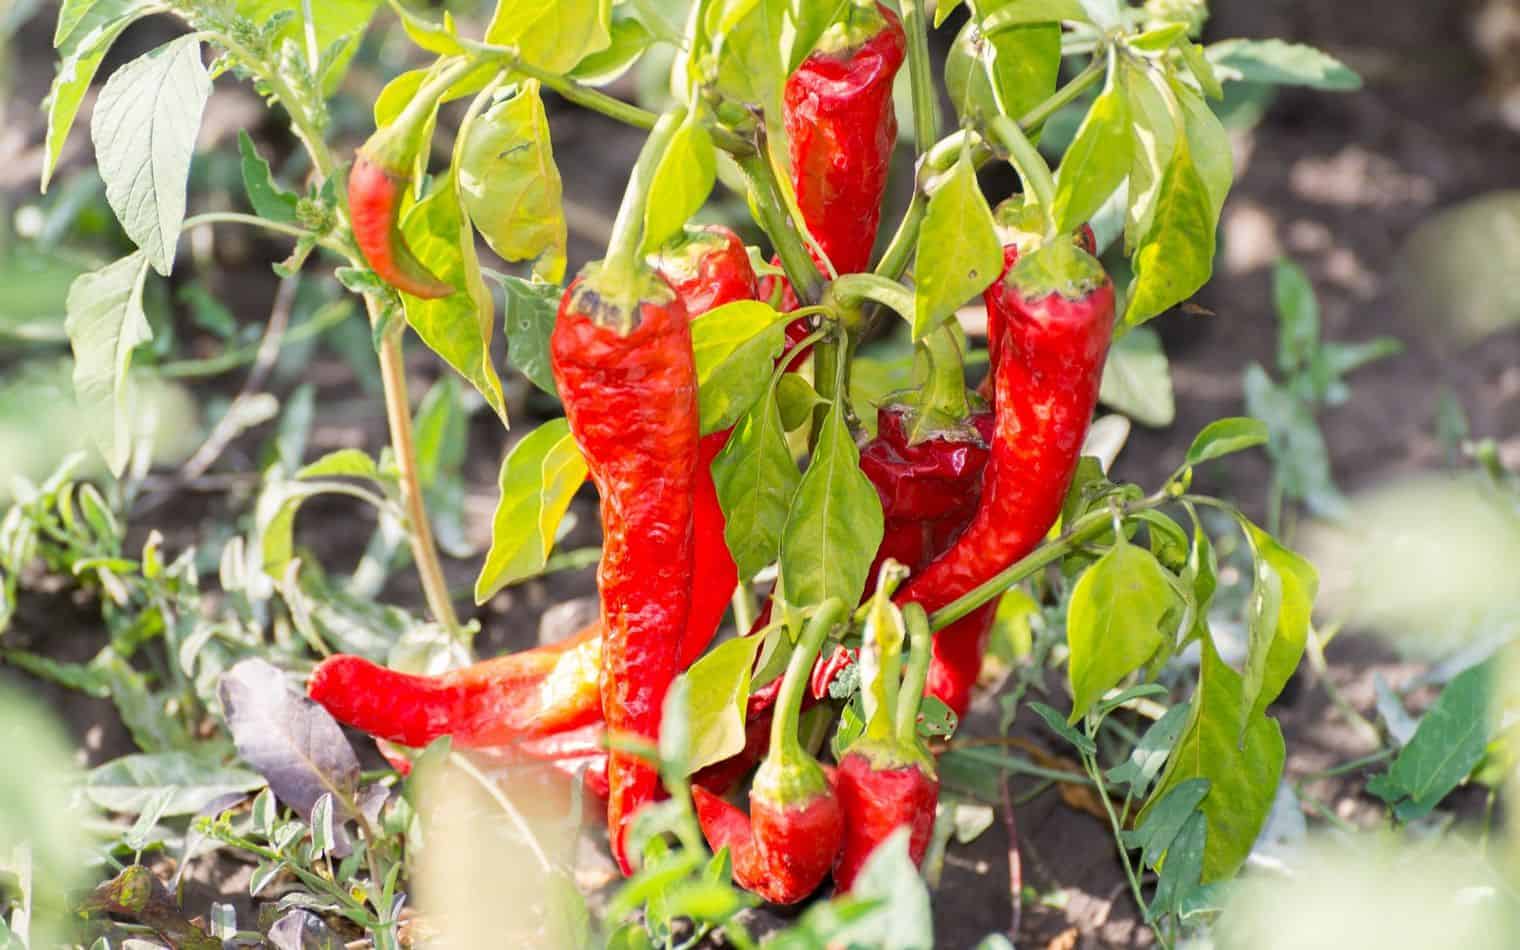
Chilies are not only used to spice up food but are also beneficial for a balanced diet. There’s an array of varieties you can try whether you like spicy, tangy, hot, or not. Indeed, supermarkets offer a wide range of chilies in different shapes, colors, flavors, and levels of hotness. Chili plants can be grown by a beginner. In this guide, we’ll teach you how to grow chilies in your garden and ensure bountiful yields.
Chili plants grow excellently in sunny weather and may die during the extremely cold months. But if they survive the frost season, then they can produce fresh chilies all year round. Since most chili varieties only take 75 days to mature, they’re also best to grow on windowsills, in a greenhouse, and in containers. Just make sure to constantly provide apt temperatures and ample water supplies.
In this article, we’ll discuss the ideal place to grow chili plants, their preferences between sun and shade, and the different types of chilies. We’ll also discuss how to grow chili peppers, the survival rate of chili plants after a year, how long it takes chilies to become fully mature, and we will also give you some tips to grow chili peppers.
Can You Grow Chili Plants Outside?
Chili plants grow perfectly under the heat with an ideal temperature between 80 to 85°F. They need ample light and warmth, even if they can bear to a lower degree, and grow best when exposed to direct sunlight and warm soil. You can plant them on sunny windowsills, in a greenhouse, or directly in the ground.
Growing chilies is like growing bell peppers. All pepper plants are tropical plants, and thus, can’t resist freezing temperatures. Chilies lessen their growth rate and stop growing completely when the temperatures lower to 10°C. Similar results are observed when the temperature reaches 35°C.
It’s recommended to buy seedlings or start growing chili indoors before you transfer them to your garden. Transplant them outdoors during the second half of spring, and harvest the first chilies after two months.
Do Chilies Prefer the Sun or Shade?
Chilies love to grow in direct sunlight rather than shadow. Although they do grow in the shade, they don’t produce as many fruits since cold climates can stop the plants from producing flowers.
A few indoor chili varieties are also made as home décor. Those lighten up a dull atmosphere. However, growing chilies indoors is difficult as they require dry air, ample space, suitable lighting, extra care, and attention.
High temperatures and irregular watering can result in pests attacking the chilies and them catching various types of diseases, one of them being blossom-end rot disease.
Ideally, chilies should maintain evenly moist soil to produce flowers that develop into fruits. During the mid-summer, they need to be watered two to three times a week (depending on the soil type, wind exposure, and rainfall in certain areas).
18 Types of Chilies
There are plenty of varieties of chilies around the world. Each variety has a distinct degree of hotness, appearance, and some take a longer time to mature, such as habaneros. The following are 18 common types of chilies that are grown in backyards.
- Cayenne
These are long and thin chilies with medium to high levels of spiciness. - Tabasco
These are short chilies that also have medium to high levels of spiciness. They are best known for their use in Tabasco sauce. - Jalapeño
These are short with a small taper and have medium heat. They are ideal for salsas and pizza toppings. - Anaheim
These are long and tapered chilies that have mild spiciness. - Habanero
These chilies are short and squat and have high heat levels. - Ghost chilies
Ghost chilies are also short and squat, and are considered extremely hot. - Friars hat
These are short, attractive, squat, and brightly colored chilies with a hot level of spiciness. - Georgia flame
These are sweet and spicy chilies with thick flesh that have a medium range of hotness. - Ring of fire
Those are thin type of chilies that are good for drying and are very hot. - Rocoto Red
This type of chili resembles a small bell pepper. Sometimes called ‘Gringo Killer,’ it has a medium level of heat. - Chocolate Bhut Jolokia
This one is a chocolate-colored version of the Guinness Book of Record’s hottest chili in the world. - Padron
This Spanish tapas chili has a mild level of spiciness when small and green, and hot if left to mature. - Hungarian Black
These are short, brown/black chilies with nice flavor. - Bishop Crown Chili
These have a typical shape, which recalls Bishop’s cap or bell, and are also known as bell chilies. They have a medium level of hotness. - Chilli black pearl
This a unique ornamental chili that produces berry-like fruits ripen from green to black to red. - Bird’s eye chili
Small but quite hot, it’s mainly used in many Asian cuisines. - Pusa Jwala
These long, thin, and wrinkled chilies, are popular in Indian dishes. - Fresno
Thin, the Fresno chili usually has mild heat and takes less time to mature.
3 Steps to Grow Chili Peppers
Growing chili plants isn’t hard. It doesn’t require a lot of garden equipment. Even one plant can suffice your needs since you can harvest 2 to 3 times a week on big chili plants. Although, for small varieties, a single plant can supply 100 chilies.
One way to have an abundant harvest is by overwintering your chili plant. Provide extra care and attention during the winter to help it survive frost, and continue growing it when spring and warm temperatures return.
Follow the instructions below to help you grow chilies in your garden.
1. Prepping the Seeds
Spread chili seeds on open tissue paper. Spray it with water and fold the tissue paper. Store it in a warm place for a week but ensure the tissue is regularly sprayed with water to keep it moist.
If you prefer to disregard this step, damp the seeds first. Spread them in the soil at a depth of about 2-3 cm. Chili seeds will germinate after a week. Water them on alternate days, constantly moist the soil, and ensure they are not exposed to strong winds.
Remember to always wear gloves while holding chilies and their seeds. Avoid touching your eyes, face, and any sensitive skin. Habitually wash your hands after manipulating them.
2. Soil and Germination
What you need:
- Suitable soil or soil in your garden if you grow chilies outdoors
- A pot if you grow them in pots
- Water
This method is simple as you only need chili seeds and a pot or some space in your backyard. First, put the seeds in a glass of water. Let the seed soak for 24 hours. Use suitable soil for growing chilies. It’s recommended to sprinkle some water in the pot or the soil before putting the seeds in it.
Chili plants require well-drained soil mixed with a small amount of compost. Keep the soil damp but avoid overwatering. Water on alternate days or every two days, depending on the weather. Observe the wet-dry-wet-dry cycle of watering.
A week after planting the seeds, they will start to germinate and you’ll notice small leaves at the top of the soil. Keep watering them every other day and ensure they’re exposed to sunlight for 4-6 hours daily.
3. Flowering-Maintenance
After a month, tiny buds begin to bloom into small white flowers. The flowers will stay on the plant for 7 to 10 days before they fall. Then, little chilies start to grow in their place.
Some chili plants experience a lack of flowers or their buds frequently drop for a few reasons.
-
Temperatures
Chili plants are sensitive to temperatures, especially while blooming. Ideal daytime temperatures are between 80 to 85°F. Night temperatures falling below 50°F or rising over 95°F indicate the dropping of buds. Briefly, over cold conditions prevents buds from forming.
-
Poor pollination
A lack of flowers or the dropping of buds is also caused by a lack of pollinating insects, like bees and butterflies. You need to entice pollinators to the garden by putting bright-colored flowers nearby. However, there also exist some products for developing flowers, although they take more time to apply. Poor circulation also causes poor pollination since flowering time is most sensitive to temperatures.
-
Fertilizer/Water practices
Too much nitrogen fertilizer affects the chili’s flower. Instead of producing flowers, the chili plant applies its energy to foliage development. Meanwhile, low fertility and small amounts of moisture result in poor flowering, the dropping of buds, and undersize growth.
Put one teaspoon of Epsom salt into a quart of water and apply this solution to the plants to improve the fruits’ growth. A high phosphorus fertilizer helps equalize high nitrogen levels. Improper watering or drought causes chili flowers and buds to drop. Finally, avoid overhead watering. Instead, use hoses and water regularly and thoroughly.
Do Chilies Come Back Every Year?
It is not guaranteed that chili plants come back every year since cold temperatures can kill them. If they successfully survive the freezing months when you protect them, then expect fresh chilies to be produced all year round. Chilies can live 2 to 15 years depending on the varieties and if given proper conditions and care.
In most cases, chili plants don’t grow much between October and January because of a lack of light and colder temperatures but overwintered plants get through until light returns in February or March.
Overwintered plants usually produce better crops in their second year as you constantly give them extra care to adapt to extreme weather conditions and enjoy a longer growing season.
To overwinter chili plants, provide them with warm to hot conditions. When it’s cold, transfer them to a greenhouse or indoors. Place them where they can get sunlight or install artificial light, and avoid putting them on the cooler sides of your home.
Pick all the fruits, including the immature ones. If unripe, ripen them off by putting them in a bag with ripe bananas as ethylene encourages ripening. Prune the leaves when they start to drop, leaving 12cm of the main stem. And, if you planted them on the ground, transfer them into the pot and slightly trim their roots to help concentrate the energy.
How Long Does a Chili Take to Grow?
Most varieties of chilies take 75 days or more to become mature. Some plants can produce ripe chilies in 60 days after planting them, while others take 120 days, depending on their species. For instance, habaneros chilies take 100 or more days to ripen.
Hot temperatures and drier soils increase the spiciness of chilies. As chilies reach ripeness, let the soil dry between watering. Ensure to harvest chilies at the peak of their ripeness. This can be differentiated by changes in the color of the fruit. Note that each variety has different colors.
During harvest, cut 5cm above the fruit using scissors. Pulling the fruit causes damage to the plant, and perhaps to the fruit. You can harvest the fruits 2 to 3 times a week. Healthy chili plants produce about 4 to 8 big chilies, but in small chili varieties, one plant supplies about 100 small chilies.
Harvest chilies at a regular height of maturity. Pick the first flowers or set of fruits to boost the plant to keep growing bigger fruits later on. Most sweet and hot chilies need 75 days for the first fruits to turn mature, and after the first harvest, it takes another 3 to 4 weeks for them to be ripe. Mature fruits usually turn red, but others turn yellow or orange. Remember the cooler the temperature, the longer time the chilies need to mature.
To make chili plants grow faster, choose seeds with faster germination and development rate. There are a lot of available fast-growing chili seeds online. And to learn about fast germination, research and follow the methods for the high germination rate of chilies.
21 Tips When Growing Chili Pepper
Chili plants need constant moisture to develop their tiny, white flowers that later turn into fruits. During the warm summer, they require watering two to three times a week. Put extra attention to your watering method during flowering until the fruits are set.
Read on to learn all the essential tips to take when growing chili peppers.
1. Planting
Plant chilies where they will succeed. Chilies love full, deep, sandy, or gravelly, well-drained soil. Add ample compost and organic content to pots or in your garden before you transfer chilies with a pH of 5.5 to 7.0.
Ensure not to plant seedlings too close to each other. Proper distancing ensures nice ventilation, sunlight penetration, and lessens the risks to contract various diseases.
2. Transplant
Don’t transplant chili plants that have started to blossom. Chili seedlings need to save their strength while they develop roots. The roots of chili seedlings aren’t strong enough to support flowers and fruits while they grow. If you buy a chili plant, choose one with stout stems and dark green leaves, rather than with flowers or fruits.
3. Watering
Thoroughly water your chili plant to boost its deep roots. A lack of water results in bitter-tasting chilies. Thus, slowly water your plant with a gallon of water, one inch per plant twice a week. Ensure not to overwater as this prevents the supply of oxygen to chili roots.
4. Mulching
Use hay, straw, leaves, or grass clippings to mulch your chili plants. Thick mulch prevents the weeds from growing and moisturizes the soil when the weather gets hot. Ensure the mulch doesn’t contain flowers or seeds that may grow next season.
5. Weeding
Keep chili plants away from weeds for they damage the chili’s roots. Regular weeding discourages the roots of weeds to grasp on the ground.
6. Protection
Wait until the soil is warm as chili plants don’t grow well when the soil is cool. Warm the ground using large black plastic for two weeks before transplanting. If the temperature is not suitable, chilies benefit from covers that keep them heated and keep bugs out.
7. Temperature
Flowering time is the most sensitive to temperatures. Extreme weather affects the blooming of flowers, and if fruits have already set, the temperatures delay the development of fruits. If you live in a warm region, shade your chili plants during the daytime.
8. Feeding
Feed your chilies with manure or compost and by watering the base of the stem. Pale leaves and slow growth are symptoms that chili plants need support. Commercial tomato fertilizer also works for chili plants. 5-10-10 fertilizer is enough for chilies.
9. Harvesting
Chilies are commonly ready to harvest in July. The more chilies you pick, the more chili plants will produce. You can either pick chilies when they’re green with a mild flavor or wait until they turn red with a hotter taste.
10. Cut the fruit
Cut, but don’t pull the chilies off the plant. Use sharp scissors to cut the fruits from the stem. Pulling chilies off from plants results in damages to the stem and roots.
11. Storing
When it’s freezing, pick the fruits or pull the plants, and place them in a dry area until the fruits ripen. If you reside in a humid region, place a single layer at the base of the grocery bag and clip to close. The chilies will dry, preventing mold in 10 days.
12. Humidity
Chili plants like above 50% of humidity. If the temperature is too dry, they droop quickly. Use water bowls on the radiators to help improve their conditions.
13. Variety selection
Select kinds of chili plants that are no more than 80cm tall. Peter pepper, Thai dragon, and Fresno chilies are best indoors.
14. Lighting
Use artificial plant light, such as lamps and LEDs, if the chili plants get a small amount of light. You can also use LSR 865 for cultivation.
15. Pests
Pests that harm chili plants include spider mites, aphids, thrips, leafhoppers, and whiteflies. They eat the plants and spread viruses to them that cause large damages. Use neem oil to protect against sucking pests.
If you notice pests, extract them quickly. Largely infected plants should be removed from the garden before they infect other plants.
16. Chili grower protection
Ensure you always wear gloves when handling the seeds and cutting hot chilies. Spicy varieties can harm your skin and eyes if you touch them. To prevent accidental ingestion of hot chilies, avoid growing chili plants near areas where kids and pets usually play.
17. Buying seeds
Buy certified seeds from legitimate sellers or seedlings from garden centers, and transplant them directly to their final positions. Remember not to plant your seedlings in areas where you previously planted tomatoes, eggplants, and other chilies to prevent soil-borne diseases.
18. Pruning
Although not all chili varieties require this, pruning helps proper aeration and protects the plant against infections caused by moisture. To prune, put a plastic or bamboo stake near every plant and gently tie the stem.
19. Irrigation
Develop a large root system. During the growing season, where plants develop the first flower, supply them with the same water amount as during the previous stage. Then, at the fruit filling stage, the amount of water should reach maximum measure. At the ripening of fruit, lessen the water and skip watering when it’s time to harvest.
20. Marking
Use row markers when growing chili plants to determine the varieties and differentiate hot chilies from sweet ones.
21. Composting
This is an environmentally friendly method that provides good results in plant nutrition in the backyard and allows you to save money. With this method, organic residues like leaves, thin branches, peels, and other food residues, with the help of microorganisms, are transformed into compost, which you can use to prevent soil erosion in your garden and soil pathogens.
Conclusion
Chilies are one of the easiest vegetables to grow for beginners. If you have just started gardening, planting chilies is a good way to start your vegetable garden. Aside from being low-maintenance, chilies are also very healthy which makes them a top contender for the plants that you should have in your backyard garden.
After reading this article, you now have sufficient knowledge of how to grow chilies in your garden. Wherein, you’ll be able to protect these plants during the freezing season and have a bountiful harvest, and stress-free gardening experience, away from pests and diseases. As long as you follow our tips and take care of your plants, you’ll be harvesting chilies in no time.