Installing a metal roof properly is the key to a beautiful and safe house. You may think we are biased, but a metal roof has a lot up its sleeves. It provides your home with durability and energy efficiency. It also makes it a safe place to go to every day. With all these facts rolled out, how far should a metal roof overhang?
A metal roof without support should slightly overhang. It should be 2 inches high, and no more than 4 inches if it hangs lower. Fix the metal roofing with a drip edge flashing. Doing so will protect the under roof and underlying wood from soaking in water during the rainy season.
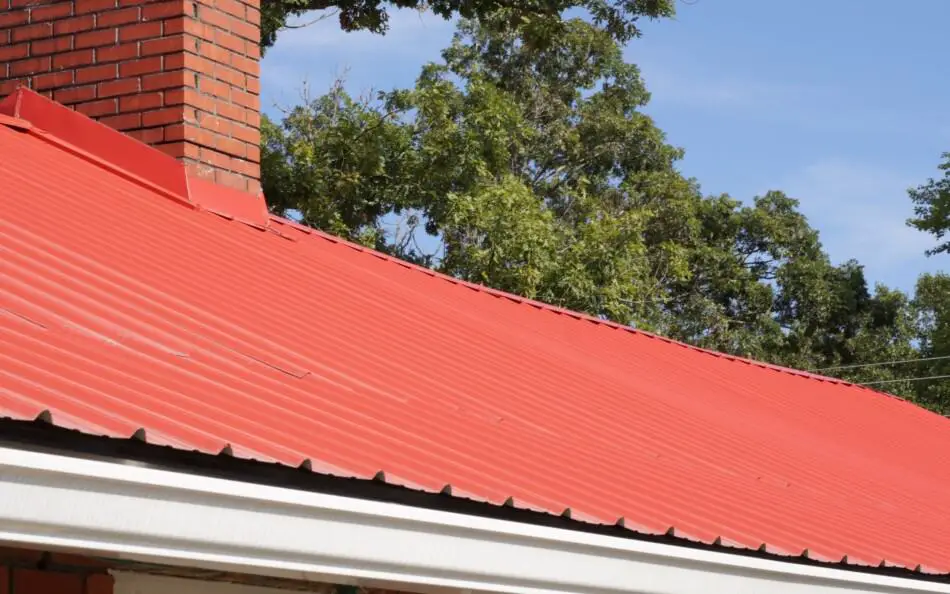
Most metal roofs are galvanized steel available in various sizes. However, there also exist many aluminum metal roofs that are equally impressive and durable. Installing a metal roof overhang is not as hard as you might think. If you are adventurous enough, you can do the roofing for your home yourself.
Are you currently considering installing a metal roof on your home? If so, here are our research-backed techniques on how to go about it. You’ll see it is both easy and affordable. Whether you are using hired hands or DIY, keep reading to find out more.
Do You Need Drip Edge on Metal Roof?
If your metal roof overhangs over an inch, there is no need for a drip edge. In this way, the water flowing from the roof ridges will be redirected from the fascia. However, if the metal roof is fixed otherwise, the ridge water will flow into the shingles. This will cause water leakage in various parts of the house and may lead to ugly damages.
One of the standard requirements for homes these days is a drip edge. Although most people who went before you in building homes might have gotten away with this, it has become one of the building codes in most areas. This raises the million-dollar question: why exactly is a drip edge so important when installing a metal roof?
7 Reasons Why You Need a Drip Edge on a Metal Roof
If you are considering having a drip edge for your metal roofing, you should at least know the good it will do to your home. For example, it will prolong the lifespan of your house, which probably took you sweat and tears to lay down. Read along to find out about the other reasons why you must install a drip edge.
- It Keeps Water Away from the Fascia
A drip edge on your metal roof will help protect the vulnerable fascia and other parts of the house. It does so by redirecting water away from these soft, risky parts of your house. They are susceptible to damage when exposed to excess moisture, can easily rot, and are likely to be discolored even when they stay put.
- It Guards Against Wind-driven Rain
On a windy rainy day, things can get messy and water is splattered all over the roof inconsistently. That is where a drip edge becomes a lifesaver. Hang drip edges will fight the wind from haphazardly pushing water around in the roof, which can cause some serious damages. However, if the drip edge is installed between 2-4 inches, your roof is safe.
- It Keeps Pests Away
A drip edge aims to cover the opening between the roof deck and fascia board, also known as the ‘carpenter’s gap.’ This space acts as a door that keeps pests and rodents from finding their way to your home. Many animals, like rats and lizards, are known to crawl in through any opening. If you do not like such unwelcome visitors on fours, a drip edge is a good idea for you.
- It Provides Stability to Your Roof
When storms and strong winds join forces, nothing is likely to stand firm on their way. Unless, of course, it has a strong reinforcement. A drip edge is such a reinforcement you need during these seasons. It is one of the benefits you should give your home to protect it against any damages.
- It Keeps Your Porch Dry
No more mopping away water on the porch after a downpour, all thanks to drip edges, which redirect the rainwater into the gutter and down the drains! No matter how heavy the downpour is, you can still enjoy coffee with some company as you watch the raindrops without getting rained on.
- It Protects the Basement
A drip edge reinforcement is not only for the upper part of the house; it also protects what is directly beneath the roof — your basement. When the drip edge redirects the rainwater to the gutter, no water will soak down on your basement. However, without it, you can rest assured that you will find a damp basement after every downfall.
- It Prevents Ice Dams
Winter can never be friends with your roof. It has a way of building unwanted mounts of ice on it, which often culminate on frozen roofs. The unthawed and undrained snow on your room will moist your roof, and when moisture is not properly drained, it eventually causes wood to rot. This is a scenario you are looking at if your home does not have a drip edge to flush away the snow mounts.
Popular Types of Drip Edges
You can find various types of drip edges on the market. However, you do not want to just invest in anything that advertises itself so loudly. You need value for your money. This translates to a durable drip edge that can hold for as long as the house stands. Here are some of the most popular types you should give a chance to.
C-style Drip Edge
This drip edge shaped like the letter C is one of the best and most popular among home builders. The shape itself has a beautiful design that will make your roofing interesting and attractive. These drip edges are placed under the decking of the roof to roll the water away into the gutter. This design is highly recommended if your roof does not have fascia boards.
L-style Drip Edge
This type of drip edge is designed to be bent at a 90-degree angle. One part of this shape will be fitted under the roof while the other protruding part of the letter L is laid firmly on the fascia board, which will protect the drip edge. This type of drip edge is usually used with steep incline roofs. Besides, this shape will beautify your metal roof.
T-style Drip Edge
This drip edge design is a little more complex than the ones mentioned above, and not only in terms of design. This drip edge will also reinforce your roof in a more complex way. It is one of the most efficient drip edges with a durable servitude for your roofing. Upon fitting on the roof, it will form a strong triangular-shaped anchor for your house.
3 Popular Drip Edge Materials
We all know that a material is either the deal maker or breaker when sourcing materials for constructing your home. You need something that will prolong the lifespan of your home. Drip edges are mostly made of plastics or metals. These two materials are highly recommended for standard building materials. Just make sure they are galvanized and cannot easily corrode.
- Aluminum
Even though aluminum is not as indestructible as the steel itself, it is safe. It is one of the most popular materials used in building drip edges for your roofing. Aluminum is galvanized to prevent corrosion. It comes in various beautiful colors that can complement or contrast harmoniously with the theme of your homestead.
- Galvanized Steel
Steel is known as one of the strongest metals and one of the best, especially when used as a form of reinforcement. On the flip side, it is highly susceptible to rust, particularly if it is constantly exposed to water and moisture. That is why your steel for drip edge should be galvanized. At least 24-gauge steel is highly recommended as this will provide proper reinforcement against strong winds.
- Copper
This material will give your roof a unique look. Since copper is sturdy, it is highly preferable for excellent reinforcement. However, you should follow some specifics when using copper for designing drip edges. Notably, copper used should be no less than 0.69 mm or 29 ounces.
How Much Fall Does a Metal Roof Need?
When it comes to house construction, building codes always impose minimum standards. Bridging any of these codes might lead to the demolition of your homestead without any compensation. The fall of the roof is the slanting shape the roofing takes. This slope is calculated in ratio. The vertical slant is 12 inches from the vertical roof.
The most popular slopes include 3:12, 1/2:12, and 1/4: 12. When purchasing metal roofing panels, ask manufacturers about the right choices. The lowest falling slope is always smaller than 3:12. This kind of slope is always affordable and comes with many other benefits your metal roofing can reap from. A 3:12 slope is ideal for snowy areas.
How to Install Metal Roofing Panels?
- Start by positioning your panels at the end of the gable end. It should be facing directly opposite the oncoming rain and wind. Building against rain-carrying wind current will prevent water and the gust of the wind from forceful sweeping into the house.
- Measure the panels and mark from the ridge to the eave of the roofing. Place the panels square to the eave and ridge. This will create a square on the frames of the wind. Ensure proper panel sealing for proper coverage of the building. The panels should also be side-lapped to lock out water flow.
- The panels should overhang facing the gutters. This will make water drainage from the roof seamless and fast. The overhang should be between 1-1/2 inches. However, if you are not installing gutters on your house, hitch the overhang as high as 3 inches.
- Make sure the upper panels overlap with the panels on the slopes. If you are using a lower roof for your house, use more panels for lapping. This should create vivid horizontal rows of sealant tapes and will make your roof watertight. Besides, it will enable you to sleep well at night without constantly worrying about the rain.
Do’s and Don’ts When Installing Metal Roofs
- Don’t DIY your roof. If you don’t have the required construction skills, it is always wise to relinquish this job to a qualified professional. Forget about DIY make-believe YouTube videos; doing your roof can cause injuries and make a mess that only a skilled person can correct.
- Don’t make assumptions when purchasing roofing materials. You must always be willing to conduct thorough research and ask experienced people, such as manufacturers. Unless, of course, you don’t mind a poor building that will only survive a few years.
- Schedule regular inspections and maintenance. You must make sure that your house construction meets all the building codes. It should also be constructed with standard materials that are acceptable and recommended by the state. If you feel like something is not in place, arrange for a skilled constructor to conduct maintenance, like fixing your gutters.
- Remove obstructive branches and make sure the gutters are clean. Having heavy branches hanging heavily on your roof is dangerous as it can cause serious damages during storms and windy seasons. Also, always making sure your gutters are clean can help with the unobstructed flow of water during downpours.
- Hire professional constructors who possess first-hand skills in installing roofs. Otherwise, you might end up without a roof over your head if strong winds or a thunderstorm strikes. The same goes for repairs and maintenance. You should have a long contract with a qualified and very experienced constructor.