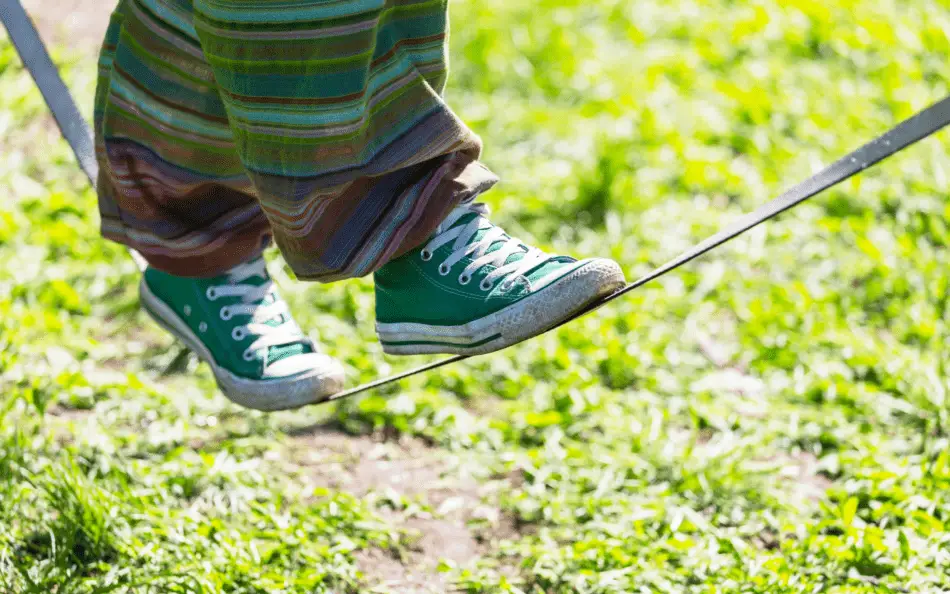
How To Set Up Slackline Without Trees


How To Set Up Slackline Without Trees

Slacklining is a fun and ideal way of honing your balancing skills while building confidence and core strength. Slacklining was developed in the 1970s by climbers in Yosemite Valley, California. It can be a perfect gift for everyone and it is enjoyable to use in your backyard.

There are different ways to set up a slackline without using a tree. All you need is anchor points and a suspender to support the line off the ground. Once you have these two, insert the slackline stands and anchors kit. The basis of the kits is the same; the only differences are the anchor point, flexibility, and price. 

There are also other creative ways to set up a slackline, from buying a self-supporting system to door frames, and installing bolts. 

In this article, we will provide ways to set up a slackline without using a tree. We will also tackle a slackline’s benefits and why it is a great product to add to your backyard.


Different Ways to Setup a Slackline without Using a Tree

Slacklining is the ideal way to practice your balancing skills right in the comfort of your home. A slackline is a 2-inch-wide nylon webbing strap with a ratchet tension system. Some designs feature a rubber coating to make balancing on them easy.

Most people attach slacklines to trees, without the use of A-frames or any other tools. Some slacklines also come with an extra helpline or training, which is perfect for beginners as it helps them hold on from above and encourages the correct positioning of the user’s arms.

Slacklines can also be purchased with protective tree pads, an instructional guide, and a bag. The price of a slackline can vary from $40 to $100 depending on the length and beginner’s kit. Although slacklines are fun to have in a backyard, can you set it up without using a tree? Worry no more for here are ways to set up a slackline without anchoring it to a tree.

1. Use a Kit

Setting up a slackline is possible even without the use of a tree; all you need is anchor points and a suspender to support the line off the ground. Once you have these two, insert the slackline stands and anchors kit. The basis of the kits is the same. The only differences are the anchor point, flexibility, and price.

Below are some types of slackline kits.

  • Slackabout Kit

    A Slakabout kit is a design with a simple frame and anchor that isn’t technical. It is also a cheap choice and a highly portable type of kit. Pin the ground nails and set up the A-frames made of wood underneath. The height of the Slackabout kit is ideal for most users. The only drawback of this type of kit is that it takes a lot of effort to drive the nails into hard ground. Slackabout kits’ price starts from $100.

  • Freedom Kit

    The Freedom kit offers a complex A-frame for slackline that uses ground spikes instead of augers. The ground spikes in this type of kit will hold massive loads compared to an auger. It is ideal for users who want to perform tricks on the line. The A-frame of this kit has multiple height settings, and the price for this kit starts from $280.

  • No-tree Slackline Anchor Kit

    The No-tree Slackline Anchor kit is a heavy-duty and adjustable A-frame kit. It has a sturdy anchoring system that doesn’t need to be pulled out of the ground. The metal A-frames of this expensive kit come with adjustable levels. This kit is recommended for professional and serious slackliners due to the adjustable frames and sturdy anchors. The price for the No-Tree Slackline Anchor kit starts from $415.

  • Gibbon Independence Kit

    The Gibbon Independence kit is a highly polished type of slackline frame. This auger kit comes with different height settings. Usually, this kit includes a slackline if you don’t have one. It is perfect for kids because of the multiple height settings. The price of the Gibbon Independence kit starts from $252.

2. Permanent Deadman Anchor

Another option is to set up a permanent deadman anchor. To do so, dig a T-shape hole at the end of the line. Place the anchors, wrap the chains around, and pass to the surface at a 40° angle. Fill the hole with soil, leaving the chains and clevis accessible. You might also want to consider making your A-frames when creating a deadman anchor. It is an ideal solution if there are no trees in your backyard.

When building a permanent deadman anchor, you’ll need a shovel, two solid anchors, chains, two shackles, and A-frames. Use a sturdy anchor, like a metal tube sealed in concrete, and instead of a slackline, a normal hardware chain. On the other side of the chain, use a shackle to attach the slackline.

3. Auger and Duckbill Earth Anchors

Another great option to set up your slackline is to use auger and duckbill earth anchors. This technique is ideal for sandy soil. However, it isn’t good with pure sand. You’ll need four anchors, two shackles, slings, and two A-frames to build it.

Auger and duckbill earth anchors are quite expensive but are way easier to use than the deadman anchor method. Auger anchors are cheaper than Duckbill and easy to pull out the ground. Duckbill is expensive and requires a drive-steel tool to hammer it to the ground. Overall, it is easy to drive into the ground but difficult to pull out as you have to dig to get them out.

4. Build Your Post

Building your post is ideal for setting up a slackline if trees aren’t available in your backyard. However, in some areas, you might need a permit when installing it, so make sure to check whether you need a permit with your local building authority.

Here is what you’ll need to build your post:

  • A tugging tool
  • Two 8-foot-long rounded wooden posts with a diameter of 8 inches
  • Concrete mix
  • Water
  • Spade
  • Trough

Dig a 5-foot-deep hole with twice the width of your wooden posts. Install the post on the dug hole and fill it with concrete mix. Make sure the post is placed at the center of the hole. Wait for two days until the concrete mix is firm and ready to anchor the line. When anchoring the slackline, wrap it multiple times around the wooden post to prevent it from slipping through.

If you plan to set up a slackline that’s higher to the ground for some tricks, we recommend using a thicker, sturdier, and longer pole. Make sure to keep the same ratio of 5:3 underneath and above the ground.

5. Use Your Car

If the aforementioned ways of installing your slackline are unachievable for you, you might want to consider using your car. This setup is ideal for walking a short line but not for heavy tricks that involve strong forces or tension. Also, never use your car to tighten the slackline for you could damage it.

You can use your car to anchor it to the towing shackle. The wheel log method is another way to use your vehicle for setting up a slackline. if you decide to try this method, get a loop of the slackline under the car wheel and anchor it to a piece of wood. Then, use your A-frames to raise the slackline to your desired height.

6. Be Creative

There are other fun and creative ways to set up your slackline if trees and the option above aren’t applicable for you. You can look around your home and backyard for locations where it is possible to set a slackline. If you are living in rural areas, there are many ways you can anchor a slackline, from using a concrete or metal pole (if you have one) to big boulders, a park bench, or simply anchoring the points off the ground.

Although, note that when looking to set up your slackline, avoid anchoring it on load-bearing support, especially at your home. The twisting force of a ratcheted-down slackline is much greater than you can imagine. Consider setting up the slackline in an area in your backyard, where you can permanently drive down the anchor points.

Another permanent option is to install slackline-specific wall anchors that are usually set up in concrete walls. Below are some ways to set up your slackline indoors if you want to do so.

  • Buy a Self-supporting System

    Many self-supporting systems available on the market can complete the setup of your slackline. It can be set up indoors and keep the slackline a few inches off the ground. One of the most popular self-supporting systems is the Gibbon Slackrack 300. It is ideal for kids, especially if you want them to practice slacklining indoors.

    Although, the drawbacks of a self-supporting system are that it can be too close to the ground, it is expensive, costing over $1,000, and the length is about 10 feet long.

  • Door Frames

    Door frames make perfect anchor points for your slackline if you don’t have time to buy or create one. Lay the board flat and in a horizontal position in front of your door frame, and on the other side, set up your A-frame. Then, anchor your slackline in it.

  • Floor Bolts and Chairs

    If planning a permanent setup of the slackline indoors, you can install big bolts on the floor and use a chair as an A-frame.

  • Concrete Wall Anchors

    If you have a wide space indoors made of solid walls, you can install permanent concrete wall anchors to set up a slackline.

There are many ways to set up your slackline, whether you wish to put it outdoors or indoors. Be creative and resourceful when thinking of the ways to install it. Although, always ensure the safety of you or the children using the slackline when setting it up.


One of the things that makes planning outdoor activities a bit complicated is getting the necessary materials that you need for the games that you want to enjoy. If you don’t want to go through this hassle, we have 11 backyard games that you can play without equipment that you can enjoy with very little preparation. 


Benefits of Slacklining

Children and kids at heart who love slacklining can acquire numerous benefits when using a slackline, from having fun to honing balancing skills, bouncing, falling, and staying active indoors or outdoors. Slacklining helps people build confidence, improve their focus, and develop their core strength and balancing skills.

But that’s not all! Here are other benefits of slacklining:

  1. It is a full-body workout, since balancing on a slackline requires using your entire body. Engage all your muscles and focus on walking on them without falling.
  2. Slacklining is the best way to hone your balancing skills. Walking on a slackline is different from other activities that have to do with balancing as the slackline bounces and swings as you shift your body weight.
  3. It leads to a better posture, stronger back muscles, reflex control, and improves your core strength.
  4. Slacklining helps sharpen your focus.
  5. It helps you with rehabilitation and injury prevention. It prevents common leg injuries since you’re practicing stability and improving the stability of your knee joints. Slacklining is also used in the rehabilitation and recovery of some knee injuries, such as anterior cruciate ligament (ACL) surgery.

Slacklining can be practiced anywhere, and your backyard is the perfect place for it. It has become popular as it allows you and your children to have fun outdoors.


Tips For Beginners

If it is your first time to try slacklining, here are a few things to keep in mind.

  • When starting, position the slackline low or close to the ground to prevent injuries or getting hurt after falling.
  • Ratchet the slackline as tight as possible.
  • Keep your head straight and your eyes up when walking on the slackline. Avoid looking or peeping at your feet as you walk on it.
  • Take your time when walking on a slackline to avoid falling. You can also start balancing at one foot first, and then, count to 100 before switching to the other foot.
  • It is best to start barefoot when learning to slackline.
  • To lessen the bounce of the slackline, have an adult sit on the other side of the line.

There are many ways to use your slackline besides walking on it. Be creative and have fun with it. Don’t limit yourself when slacklining so you can enjoy it!


Conclusion

What if you want to give slacklining a try but your backyard lacks trees that can serve as your anchor points? Luckily, you have nothing to worry about because there are ways for you to set up a slackline even if there are no trees around. They do say that if there’s a will, there’s a way. All you have to do is observe your surroundings, remember the tips that we shared in this article, and be a little bit creative.

Now that you know about the different ways to set up a slackline without using a tree, you should still consider your safety or that of whoever will use it. Slacklining is an exciting and fun activity you can do in your backyard. With the tips given above, along with slacklining’s benefit, it’s time to hone your balancing skills and gain some confidence.

Recent Posts