Ice rinks are an ideal attraction in the winter. Some people purposely visit ice rink parks or ice skating areas and spend money to use such places, while others prefer to build their own in their backyards.
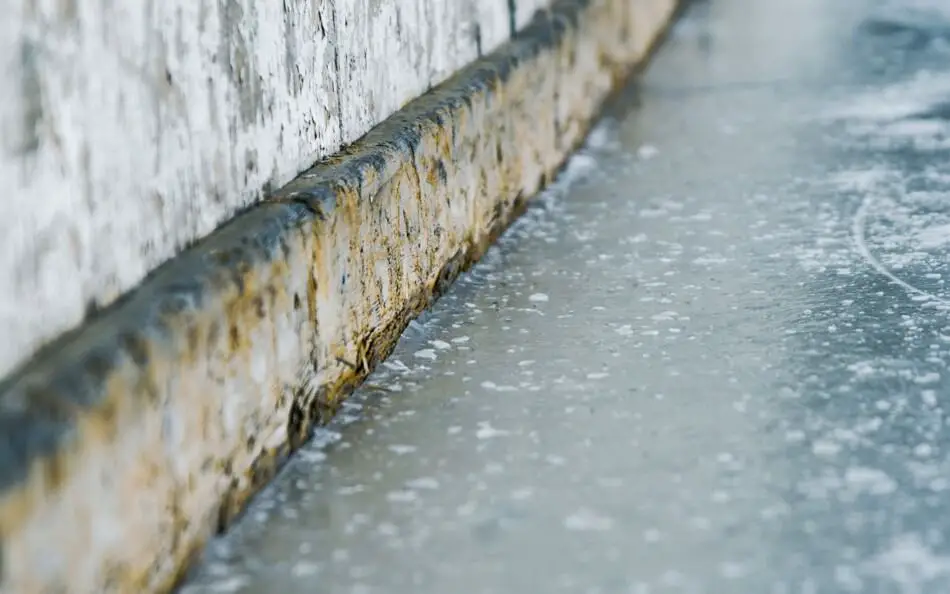
When building an ice rink, look for flat surfaces to secure its stability. You can build an ice rink on concrete as long as you cover it with liners to prevent the ice from melting. Concrete is known to absorb heat more easily than lawns.
Although, there are do’s and don’ts you need to consider when putting rinks on top of concrete. Make sure your area has a freezing temperature so you can maintain the solidity of the ice. This can prevent the concrete from melting the ice since there is less heat.
In this article, we will discuss the importance and reasons why you need a liner for your backyard rink and how to build it.
Do You Need a Liner for a Backyard Rink?
In building a backyard ice rink, you are required to use a liner. This material aims to hold the water and form it into a block of ice. Temperature changes happen, and the ice might melt but the liner will serve as its container. If the temperature is starting to fall, it will refreeze the melted ice.
To alleviate and control the drawbacks of melting ice, you should use a liner to preserve it regardless of the season or temperature changes. There are several factors you must consider when buying a liner. The most salient features to remember are its size, thickness, and color.
- Thickness
The common range of liners is 6 mils to 14 mils. Mil is calculated with 0.001 of an inch. Note that the higher the number of mil of the liner, the thicker it gets.
Thickness is a component that indicates how durable a liner is. Although thick liners may last long, you have to keep in mind that they should also fit into your backyard rink.
- Size
When choosing an ice rink liner, make sure it will cover the whole rink, up to its boards. The standard measurement for an ice rink is 200 x 85 feet with a corner radius of 28 meters. Since you have already established a rink in your backyard, you need to know its actual measurements so you have an idea of the size of the needed liner.
The liners you need to buy should extend a bit to ensure you can cover the rink and boards. That means you need a bigger size than your whole ice rink. It is recommended you add about 5 feet of liner extension on both the width and length of your backyard ice rink.
- Color
The most common advantage of choosing a white liner is that it complements the color of snow. The color is also recognized for its ability to protect the ice from ultraviolet rays, which can help in sustaining its temperature. If you place a different color on the surface of the ice rink, it may affect its efficiency in freezing the water.
Traditional Method
The importance of using a liner maintains the consistency of the ice in the rink. Some types of backyard ice rinks don’t require you to use them. The best example of such is a traditional ice rink.
A traditional ice rink allows you to build them using packing snow and water. This kind of snow is near the melting point and the features possess both water and soft snow. If you have seen the snow used to create a snowman and other snow structures, it is what packing snow looks like.
The packing snow will freeze the water you will put on the surface. The disadvantage of this method comes in if the temperature is starting to rise and the ice completely melts. This is only recommended for places with freezing winters.
Before you decide to use the traditional method of building an ice rink, take note of the temperature in your area. You will waste water from the melted ice if the temperature rises instantly. This would require you to apply another set of snow and water to refill the ice rink.
Why Use a Liner a Backyard Rink?
Using a liner for a backyard rink helps freeze the water faster, maintain the solidity of the ice, and lessens maintenance. This material can prevent water from draining, which can protect your lawn, concrete, and asphalt ground. You can also save money on maintenance if you use it.
- Freeze the Water Faster
Traditionally building ice blocks in the rink will require more hours to freeze compared to those with liners. Since the main purpose of using a liner is to hold and freeze the water, the water will freeze faster if you incorporate it into your rink. You can fill the ice rink with water after you’ve installed an iron sleek rink bracket to the boards with a liner on top of it.
- Longer Use
The use of liners contributes to the longevity of ice in the rink. Without it, and if you built your rink with the traditional method, you have to wait for the temperature to be freezing. You’ll likely waste the water and snow as it will drain onto the ground.
The liner holds the water in the rink, which is a great advantage in prolonging the solidity of the ice, meaning you can start putting the liner and water on the rink as soon as winter starts. Aside from the fast freezing hack, you can get with the liner, it will reflect the sunlight off the rink and help sustain the water inside the rink during thaws.
- Lessens the Maintenance
Without the liner, you will waste the water caused by the thawing of ice as it will drain outside the rink. That will leave you to maintain it by reapplying the traditional method and waiting several hours for the temperatures to drop and freeze the water. You can avoid this disadvantage by using a liner.
Make sure there are no drops of water wasted if it thaws since the liner will hold it. Although the ice may soften a bit, the amount of water is preserved in the rink, maintaining its smooth surface. The water will eventually turn into ice again when the freezing temperature returns. In this way, you don’t need to rebuild the ice in the rink after it melts.
- Reduced Expenses
You do not need to refill the rink if the ice melts as the liner serves as its container. If your rink doesn’t have a liner, you will probably spend more money on filling the drained water. One thousand gallons of water can cost about $15, and backyard ice rinks require 5,000 gallons of water. That is why you should use liners to prevent this from happening.
- Lawn Protection
The drained water from the ice rink is bad for your lawn. The parts of the flooded lawn are destroyed and require you to revitalize it after the season ends. The liner serves as a cover for the lawn, stopping the excess water from flowing outside the rink.
- Cool Temperatures for Asphalt and Concrete
Asphalt and concrete absorb heat better than lawns. They will hold the warm temperatures, which can cause the ice to thaw. With the use of liners, you can prevent ice from melting as it will serve as a cover against the concrete ground. It will also prevent the water from seeping into the concrete cracks if the ice melts.
Water accumulated in the cracks of concrete may freeze and inflict more damages. You should use liners if you plan to build the ice rink in asphalt or concrete ground. In this way, the water won’t flow out of the rink.
Asphalt and concrete cracks, if exposed to extreme cold and heat, tend to crack. That is why you should protect the ground by using a liner. It will alleviate the temperatures and prevent damages.
Steps in Building a Backyard Ice Rink
In building a backyard ice rink, you need to look for flat ground. Ensure it is watertight before installing the rink materials and boards. Spread the liner, fill it with water, and let it freeze for 12 to 24 hours.
- Look for a flat ground
The first step in building a backyard ice rink is to look for an ideal space. A flat surface is recommended since you will establish a flat ice rink. The best example of this is the concrete and asphalt ground surfaces.
Avoid picking sloped areas as doing so will affect the firmness of the ice rink. It is a hassle to install materials on a bumpy surface as you can’t ensure stability on this type of ground.
- Secure leaks
Since you are going to form ice in the rink, you should make it watertight. The water shouldn’t leak if you start to fill it inside the rink. To ensure you can avoid this, spread a plastic foil to the whole surface of the rink and fasten it.
- Install the rink materials
You can buy pre-assembled ice rink materials at some stores. Although you can easily install these materials, they are commonly used for artificial ice rinks. In terms of durability, lumber, plywood, and ice rink boards are ideal to put up containment walls.
You can estimate the size of the containment walls you are going to use by checking the ice rink’s bracket spacing chart. Use iron sleek corner brackets at the corners of the rink to seal it. We recommend you brace at least two brackets on each corner of the rink.
- Check and install the boards
Surround the whole ice rink with boards using plywood. This part is important to prevent the user from accidentally slipping out of the rink and protect the people outside of it. Check the insides of the rink to prevent tearing the liner as it may contain pointed objects.
Some are specifically made for ice rinks and are available in markets. If you want durable boards, use high-density polyethylene. It is usually used for ice hockey rinks. Note that this type of board is very expensive.
- Spread the liner
The process involves a liner to guarantee the protection of the ground from the water draining and prevent you from wasting water due to leaks. Measure your ice rink area before buying a liner at the store. Use the measurements of the rink as a guide when measuring the liner. Don’t forget to add extensions so you can fully cover the rink boards.
- Fill it with water and freeze
Fill the rink with water using a hose. Avoid wasting water or spilling it, especially on the frame. You can use a cooling agent to freeze the water in the rink or an indirect refrigeration system. The process involves the cooling of secondary coolant through the heat absorption of the primary coolant.
Aside from the artificial cooling method, you can let the water freeze with the outside temperatures. Make sure the temperatures are adequate for the water inside the rink to turn into solid ice. It can take up to one day for the process to be complete depending on the wind and temperatures that affect it.
When you fill the rink with water, fill it gradually or in layers. You need to fill the rink at a low level first, and then, let it freeze. Once the first layer has frozen, refill the rink with water for the second layer. Continue until the whole rink is filled with ice. Doing so helps form a dependable ice thickness for your rink.
Conclusion
Ice rinks help you enjoy the activities during the winter. Even though it is not advisable to spend a long time outside in cold temperatures, you can still have fun, even for a short time with your family. You don’t have to go out and look for some ice rinks if you have your own ice rink in your backyard. With this article, you are equipped to build one in your concrete space. Just make sure to follow the guidelines above to avoid wasting your money.