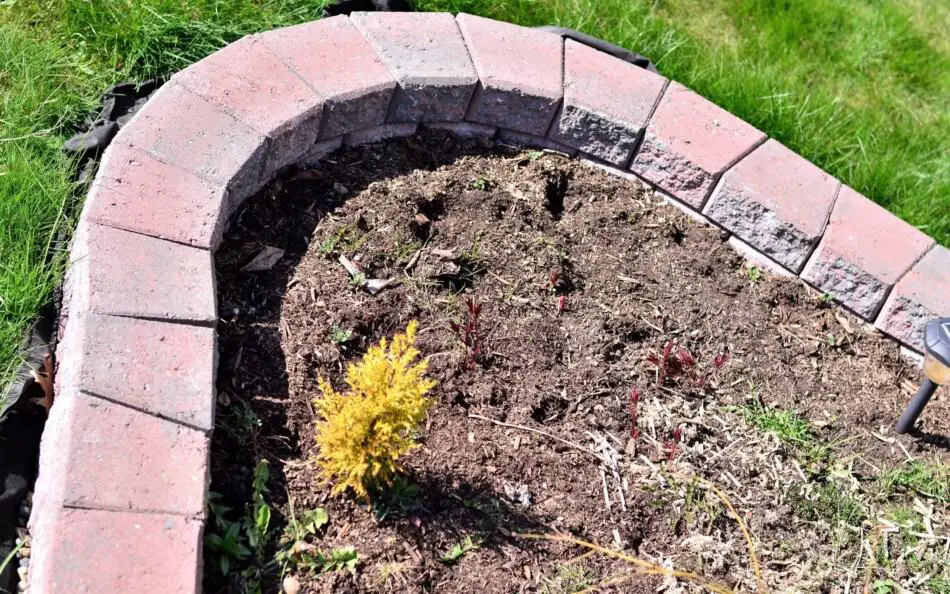
You can manage your plants and put them in order in your garden and yard through landscaping. Aside from making your space look clean, trees and plants contribute to cooling the atmosphere.
When preparing the soil for landscaping, you must first identify the type of soil that you have. If it is compacted, spread compost and till it. Make sure to grade the planting bed allowing water drainage. Level the bed soil by raking it and proceed to plant.
In this article, we will discuss the steps in preparing solid for landscaping, how to know if your soil is healthy, and how to prepare the soil for landscape planting.
Steps in Preparing Soil for Landscaping
Before you start planting in the spring, you should prepare the soil. We recommend observing about six weeks from the days you’ll start to revitalize your yard. In some instances, you won’t be able to move the soil in your place as it is frozen and need time to thaw after the winter.
In preparing the soil for landscaping, you should follow a few steps to ensure there are no obstacles to hamper the work.
1. Clean debris
After the winter, you will probably see the wastes and garbage, such as tree cuttings, leaves, and many others, on the soil. For a smooth transition of the steps, the first thing you should do is remove the junks and clean everything up.
Plant debris is not just interference but can also contribute to the formulation of fungi, bacteria, or viruses that can bring about diseases to other plants. You should also remove the weeds as they are a total disaster to the plants’ growth. Just ensure the soil is not covered with any object or dead plant.
2. Test the soil
The next important step is to test the soil. Soil testing refers to the test conducted to check the overall health and characteristics of a soil. With such, you will know whether there are deficits in nutrients and if the pH level is ideal for plants, and you’ll find a way to fix the deficiencies.
Once you have the information needed, you can consult an expert on what the best products you can apply to the soil are. If you are already known to do it, continue with the process. Soil amendments are usually applied to improve the quality of the soil.
3. Till the soil
You may encounter some drawbacks to your soil after the shifting of the season. Before you let the landscapers continue with their work, you may want to check if the soil is compacted. This kind of soil is not ideal to grow plants as it can hamper the air and water as they are compressed.
You can solve this problem by tilling the compacted soil. This phenomenon usually happens to loam and clay soils. It might also occur in sandy soils.
Don’t till the soil if it’s wet or if it is intended for flower beds. You must till it for up to 3 inches deep. Applying 8 inches of compost to the topsoil can also help correct the compacted soil. Beware that too much tilling can have negative effects on the soil.
4. Amending the soil
Once you have the results for the soil testing, it’s time to apply amendments. The result can highly contribute to the health of the soil. Healthy soil also equals the healthy growth of plants.
The characteristics of the soil also depend on what plants you are going to use. For example, if the plant you want requires more acid, you should increase its acidity. If the plant needs a low acid level, focus on how you can reduce it.
Besides, some soils are infertile and not ideal to grow plants. Use fertilizers depending on the number and species of plants.
5. Using a landscape fabric
The use of landscape fabric requires deep attention to prevent negative side effects on the soil. Landscape fabric helps hold the soil for the planting beds. Problems arise if the landscaper uses the wrong fabric or uses it in the wrong way. In using landscape fabric, make sure not to cover the soil.
Laying down a landscaping fabric is the easiest and most common and effective way to prevent weed growth in your garden beds. It is also made to be “breathable” and let water, air, and nutrients get in the soil to feed the plants. If this is your first time working with this material, read our article to learn the proper way to install landscaping fabric.
How to Know if Your Soil Is Healthy
A healthy soil impacts plants’ growth. Knowing the quality of the soil can help you know whether you need to amend or fertilize it. If you have ideal soil for the plants to develop successfully, it is a great advantage and less work is needed.
1. Identify the Type of Soil You’re Dealing With
To identify the type of soil in your yard, collect a small amount. You can tell the type of soil you’re dealing with through its texture. Once you’ve seen whether it’s loose, compacted, or wet, you will have an idea of what kind of soil it is.
- Sandy soil – This type of soil is light, dry, and loose. Sandy soil can absorb water but dries up fast. It also allows nutrients to penetrate it easily.
- Clay soil – As the name suggests, it has the characteristics of clay. It can retain water and nutrients but discharge water gradually, making it hard and compressed.
- Loam – This is the most commonly used soil for plants. Loam possesses silt, sand, and clay texture, which is balanced for the plant to grow.
- Silt – Silt is a well-drained type of soil. Its texture is fine, which permits the drain of water and allows air.
The best type of soil to use for planting is loam since it offers a wide range of soils combined into one. Although, some plants can grow on clay soil, like iris and miscanthus. Meanwhile, tulips and hibiscus can grow on sandy soil, while silt soil is great for birch and cypress.
If you are planning to grow a certain type of plant, you should check what type of soil it prefers. In this way, you’ll know about the ideal amendments and pH level.
2. Soil pH Testing
Another factor that affects plant growth is the pH level of the soil. By knowing it, you can determine whether the soil is fertile or not. Soil with a pH level over 7.5 contains lots of alkalines, while those with 5.5 and below are acidic.
Even though plants need a balanced pH level, you should allow them some acidity. The acidity of the soil affects the amount of nutrients absorbed by the plants. In some cases, it can restrict the nutrients needed by the plants. The soil’s pH is tested through kits or soil analysis.
Soil pH test kits are available in stores that sell planting materials. If you want to ensure the result of the test, you can opt for a professional soil analyst, especially if it’s the first time you are going to make a garden.
3. Organic Soil Amendments
Ideally, use organic amendments to your soil. Using this is an advantage since you don’t need to buy inorganic amendments, which are more expensive. Organic amendments include wood chips, compost, leaves, manure, and many others.
If you have an organic matter to use, just like those mentioned above, you should decompose it before applying it to the soil. You will know when it is ready to use once it has a ground or soil smell. One of the best organic amendments is manure since it applies to most types of soil. Aside from being an amendment, it also works as a fertilizer for plants.
4. Identify the Present Organisms
Identify whether there are insects, fungi, and bacteria in the soil as those can impact the health of the soil. These elements are usually known as pests and disasters to some but bring benefits to plants’ growth. They can help in turning organic materials into instant nutrients for plants.
You should avoid using huge amounts of pesticides as these can harm the soil, organisms, and plants. Let the soil be always moist and aerated so it allows the organisms to live.
5. Mulching
Mulching is a method that consists of putting organic materials by dispersing them on the soil. Without interfering with the roots of the soil, the organic matter will naturally break down. With such, you can benefit from the prevention of weed growth and keep the soil moist and aerated.
Applying too much mulch can damage the plants since it results in allowing a great amount of moisture to the plants, as well as diseases caused by fungus. Thus, only spread the exact amount recommended for effective results.
6. Avoid Tilling Too Much
Tilling can bring about both benefits and disadvantages to the soil and plants. With such, you can permit the development of weeds and interfere with living organisms like earthworms. Although those may damage the natural features of the soil, they can also positively affect the soil.
Tilling the soil can help break down the compacted soil. You are allowed to do this as long as you do so moderately.
How to Prepare Your Soil for a Landscape Planting Project
Before you plant, you need to prepare the soil to make the planting process smooth. Use compost onto sandy or clay soil to prevent it from getting compacted. Allow some drainage from the planting bed so that it won’t completely soak your plants.
1. Identify the soil and use compost
First, identify the type of soil you have in your yard or garden. If it is sand or clay, you should use compost to loosen it. Start with the preparation by applying up to three inches of compost to the soil.
Afterward, proceed to till the soil. The purpose of compost in this process is to allow organic matter. Compost can prevent the bathtub effect, which occurs if the hole intended for the plants cannot drain and keep the water in it.
2. Balance the topsoil
Once you’ve tilled the soil, check whether or not there are about 3 inches of topsoil for the planting bed. Leaving extra space for the bed allows the plants’ roots to grow freely and hold water for their development. Estimating it is crucial so that the plants can grow successfully.
3. Allow water to drain
To let the water drain on your planting bed, shape the bed high at the back, lowering it down in the front part of the bed. Just make sure that the water is flowing in the walkways or anywhere the water leads so that it won’t create flood the bed. If you don’t remove the drainage from the planting bed, the plants will be vulnerable to soaking, which can result in their death.
Also, make sure the walkways have water drainage as well, so if the water overflows from the beds, it can flow out of the area.
4. Level the beds
Raking the beds to level the planting beds allows you to remove big stones in them. Although, don’t remove the smallest ones as they help in the drainage aspect. As you will need to rake again after you’ve planted your plants, you don’t need to make it flawless.
Leveling the bed can help make your planting process easier. These will serve as a room for the plants to grow so you better take care of them first. Everything you apply to the soil can greatly impact the plants’ growth.
Quality soil is essential to grow fruits, vegetables, herbs, and other plants. Thus, it is important that you know what type of soil you have in your garden. Read our article to know about the 6 types of soil and how to tell what yours is.
Conclusion
Landscaping your garden or backyard can make the surroundings neat and beautiful. If this is the first time you are going to landscape your yard, you need to plan everything before you proceed with the steps mentioned above. Since your soil is vital to the survival of your plants, you need to put a significant amount of effort into making sure that it is in good condition.
Knowing the condition of the soil can help achieve the successful development of your plants. There are a couple of ways to check whether your soil is in good condition or not. Once you know what the status of your soil is, it’s time for some amendments to make sure that it is in the best condition to house your plants and allow them to flourish. As long as you follow the tips that we shared in this article, your landscaping project is on the right track to success.