There’s an ongoing debate between homeowners about whether or not having backyard water features adds value to a home. To some people, it provides a relaxing and soothing area within a property. While for others, it means additional maintenance costs. Whoever is right, the decision of adding these features will be yours to make.
Having water features in your backyard can both be a daunting and rewarding task. If you’re planning to install a reservoir on your lawn, make sure you have the right materials and plans on how to make one.
In this article, we’ll show you three of the most in-demand water features that you can add to your backyard. We’ll enumerate the materials you’ll need, and how to install and remove them. Although, we’re quite sure that you won’t be removing these features anytime soon once you’ll start to experience the soothing effect of moving water.
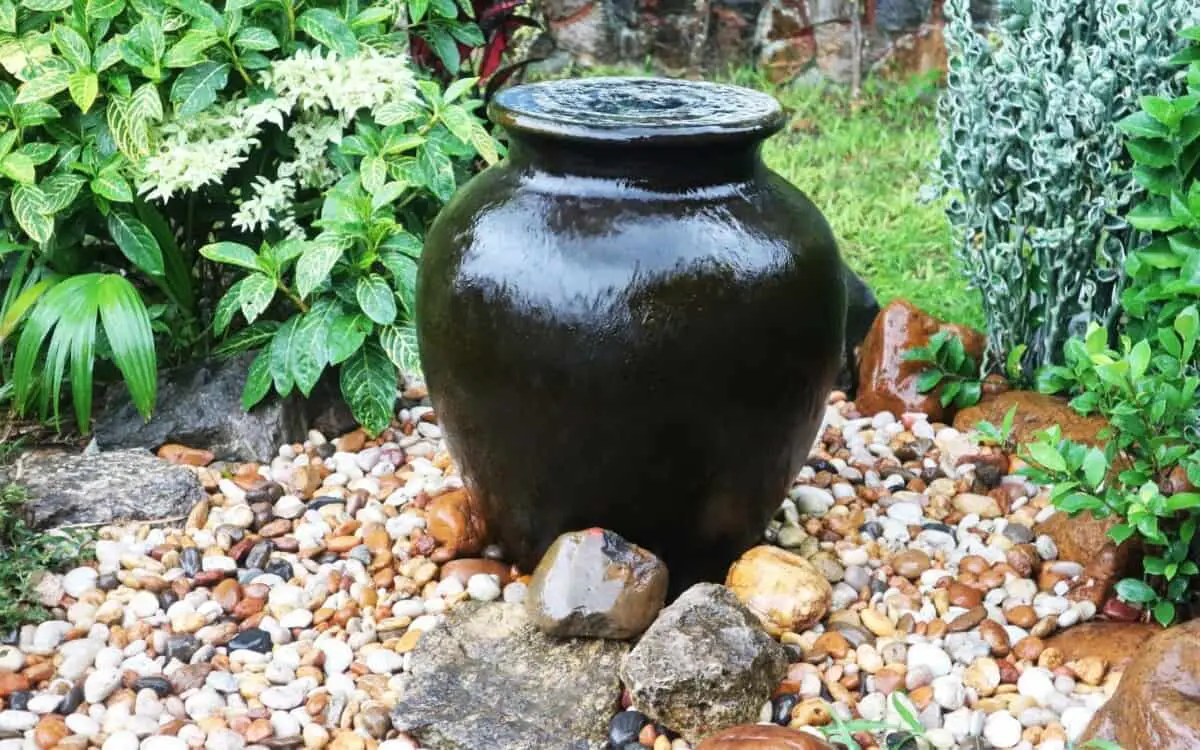
Overflowing Pot Fountain
One of the simplest water features that you can add to your lawn is an overflowing pot fountain. There’s nothing more ideal than looking at flowing water from pots that create a sense of solitude. It may sound difficult, but there’s only one thing that makes this a little complicated.
How to Install an Overflowing Pot Fountain
Materials:
- Saw
- Dremel, drill, or drill press
- Small pot
- Large pot or basin
- Fountain pump
- Small decorative stones
- Large decorative stones
- Two sticks of bamboo
Step 1: Create a hole in the small pot
The first thing people will notice on your overflowing pot fountain is the actual pot, where the water flows from. Therefore, look for a decorative pot with a simple design that will suit your house’s and lawn’s aesthetics.
Once you’ve chosen your pot, use your Dremel, drill, or drill press to make a small hole at the bottom part of the pot. Use the tubing that comes with your fountain pump as the basis of the size of the hole. Make sure that the tube can fit the hole and that you’ll be able to seal it off after.
Step 2: Attach and seal the tube
The next thing you’d want to do is attach the tube to the hole of the small pot. Leave at least a quarter of an inch tube inside the pot. Seal the hole using epoxy or something similar. Ensure that the tube won’t fall off while you’re installing your overflow fountain and through the years to come.
Step 3: Test the fountain pump
Once the seal is dry, it’s time to test out the tube and fountain pump. Connect the other end of the tube to the pump outlet port and place the pump inside your large pot with its electrical cord hanging out.
After securing the pump, pour an adequate amount of water to cover the pump intake valve. Make sure that the settings allow the pump to make the water flow back into the pump. Once everything is set, plug in the pump.
You’ll know that you implemented the right setup if the water flows out on the tube. However, if this is not happening, check the tube line and look for a pinched area, or check whether or not you plugged in all the tube and outlet correctly. Adjust the height of the fountain, water flow strength, and other settings accordingly before proceeding to the next step.
Step 4: Secure the rest of the fountain
Using large decorative stones, secure the pump inside the large pot, then cover it by adding more water. Place the small pot on top of the stick bamboos, on top of the large pot, and design it as you want. Make sure the pot doesn’t fall off. You can tie the bamboo on the external area of the pots to ensure that nothing slides off.
Step 5: Add decorative finishes
Once you’re satisfied with how the bamboo sticks are placed and are happy with the water-flow settings, you can use the excess decorative stones to design your overflowing pot fountain. Some homeowners also use polished seashells or glass to provide a shining effect once the water and sun touch it.
In this article we talk about how to maintain a clean fountain click to read.
How to Remove an Overflowing Pot Fountain
Removing an overflowing pot fountain is easy since most of the materials you used are not permanent. Unlike concrete, which you have to break with a jackhammer, all you have to do to remove this water feature is disassemble all the items.
Step 1: Drain excess water
An old pot fountain will have old water in it. The first thing you’d want to do is remove any excess water. Use a pump and hose if you deem it necessary to ensure that you drain everything away. You can also use those to remove any bird droppings, debris, moss, and leaves.
Step 2: Remove the small pot and bamboo sticks
The next thing you’d want to do is remove the small pot and bamboo sticks. Remember that the tube connected to the pump is also attached to the small pot, so be careful when pulling it. If you can, use a tool to disconnect the tube and small pot. However, if you can’t remove it, put it near the basin, where you won’t need to pull the tube.
Step 3: Remove the stones and fountain pump
Removing the stones can be a slippery task since most of the time, they have been underwater for years. Before proceeding, it’s important to remove any electrical plugs or plumbing to ensure your safety. Then, take out the large stones and the pump from the basin, and you’re all done.
Water Wall Privacy Screen
Nothing beats a good ambiance with the sun setting down, a cup of coffee in your hand, in the middle of a lavish garden, with a water wall privacy screen scenario. Imagine having a water wall project that fits an average budget and can be set up by two to three people.
However, it’s worth noting that installing a water wall privacy screen is more complex and requires more materials than building an overflowing pot fountain.
How to Install a Water Wall Privacy Screen
Materials:
Lumber:
- 1/4-inch plywood to build the water trough
- 12 pcs. of 2” x 2” x 8” lumber
- 14 pcs. 1” x 6” x 8” cedar fence boards
- 2 pcs. 1” x 6” x 8” pressure treated lumber
- 2 pcs. scrap lumber
- 1 pkg groove and tongue cedar closet liner
Water tubing:
- 10 feet water tubing
- 12 clamps and 4 elbows
- Copper tubing or flexible plastic tubing
Other materials:
- Table saw
- Power drill
- Compound miter saw
- Small compressor
- Pneumatic nail gun
- Level
- Tape measure
- Staple gun
- Pond pump
- 5’ x 5’ small sheet pond liner
- Tempered glass
- 1-1/2 inch and 3-inch wood screws
- Solar spotlights
- Staples
- 3 bags of river rocks
- Construction glue
How to install a water wall privacy screen:
Step 1: Build the base frame using the 2” x 2” lumber, the cedar fence, and the 12 pcs 2” x 2” x 8” lumber. The idea is to create a coffin-like base that will hold the boards and tempered glass. Use the wood screws to secure everything together.
Step 2: Construct the water trough using plywood that can house and secure the pond pump, hold the water, and secure the tempered glass to the base frame.
Step 3: Assembling the base is easy enough seeing all you have to do is put your built water trough inside the base frame.
Step 4: At the bottom and middle areas of the trough, screw down the wood slats, which will be the support of the tempered glass. You will notice that the wood slats won’t cover the entire area of the trough horizontally. This means that you can put one wood connecting on the upper area of the base and the other one on the opposite side.
Step 5: Attach the water trough to the pond liner, on the top area, using staples. Once you secure it, test your base for leaks by adding some water to it. Make sure that the water trough fully covers the base and frame up to its corner sides.
Step 6: Then, attach the two pieces 1” x 6” x 8” pressure treated lumber to each side of the frame, in an upright position. This will hold the tempered glass and wrapping tongue and groove later on.
Step 7: Using the pneumatic nail gun, finish the exterior of the base by installing the remaining cedar tongue and groove closet liner. This will cover the lower area of the base frame and further secure your construction.
Step 8: Use the remaining wood slats and ripped cedar fence boards to trim the base frame. Now, prepare the area where you’ll put the pump, which will be placed on the upper left side of the base. On one of the timber, cut an area where the cord of the pump will be concealed underneath. Make sure that you can screw the top area for better security.
Step 9: The next step is to install the tempered glass, which is a two-to-three-person job. Mark the inner side of the upright timber. Use a 2” x 2” lumber to secure the mark you made on its backside. Place the tempered glass between the base’s grooves and secure it with the lumber that you installed. Use another 2” x 2” lumber to secure the glass in its place.
Step 10: As mentioned earlier, place the pump on the upper left side of the base. Attach to the pump the flexible tubings along with the clamps, couplings, and elbow, inside and on top of the pump.
Using a power drill, create a hole on top of the lumber near the pump where the tubings will go through. Note that the size of the hole you make will determine how strong the water flow will be. So, start with a small hole and test it out. Then, slowly increase the size of the hole to achieve the desired flow.
Once you have the right water flow, seal the tubing with silicone to secure it in place. Attach the tubing on the upright lumber to the top 2” x 2” and secure it with large washers and screws.
Step 11: Once you have installed everything you need to make your water wall work, it’s time to conceal all the tubings. Use the cedar fence boards to conceal the tubes and electrical cord of the pump. Finish off the base fence using coats to give it a nice surface.
Add some decorative stones to the groover, as well as some water on the trough, and plug in the pump. For a better experience at night, you can also install some solar spotlights.
How to Remove a Water Wall Privacy Screen
You may have realized by now that installing a water wall water feature in your backyard can be a tedious task. Even with all the necessary materials and carpentry work, you’ll need a helping hand when you choose to add this feature to your home.
The same scenario is expected when you’re removing a water wall privacy screen. You’ll need a power drill to remove all the screws and a vacuum to drain the water.
Step 1: Before doing anything, it’s important to ensure that your water wall is unplugged. Then, remove the decorative stones, solar spotlights, and any other materials you used to decorate the water wall. Finally, use the vacuum to drain the water and remove any debris and moss on the groove and glass.
Step 2: After this, you can start removing the cedar fence boards that are covering the tubings on the side lumber and the base. Use the power drill to remove all the screws to ensure that you don’t break anything.
Remove the tubings and pump on the base fence. Remove the 2” x 2” lumber on top and the sides of the tempered glass. Once you’re done, remove the tempered glass and put it somewhere where it will be secure.
Step 3: Everything else is easy to do. Use your power drill to unscrew the screws. Then, remove the groove, the cedar tongue, and lumber on the base.
Waterfall and Pond
One of the most sought out backyard water features is a waterfall and pond. Not only is it aesthetically pleasing, but it also gives a sense of calmness and soothing sensation that anyone can enjoy. You’ll only need minimal tools and equipment to install a waterfall and pond, but the challenge will be to prepare the space for this water feature.
How to Install a Waterfall and Pond
Materials:
- Tape measure
- Submersible pump
- Shovel
- Hand tamper
- Garden hose
- PVC pipe
- Biofalls filter
- Skimmer filter
- Plastic liner
- Stone
- Spray paint
How to install a waterfall and pond:
Step 1: A waterfall and pond in your backyard is almost a permanent feature, which is why it’s important to plan and create a layout before installing anything. Keep in mind that you’ll need to create or find a natural slope for the waterfall for the project to be successful. Additionally, it’s better to place this feature near your home so that you can enjoy it more often.
Step 2: Once you know what your pond will look like and where it will be located, the next thing to do is create the shape of the pond. For that, use a garden hose to lay out the dimensions of the pond and use spray paint to mark and trace out the hose. Adjust your spray now and then to create a natural shape and flowing curves.
Step 3: Place the bottom skimmer filter and biofalls filter. These filters will determine the stream and pond design, as well as where the water will flow and collect. The biofalls filter should be placed on the highest area as this is where the waterfall is placed. The skimmer filter is placed at the farthest point of the pond because it will act as a catch basin.
Make sure that there are little to no dead ends on the pond’s water circulation. Using PVC pipes, connect both filters and ensure that the pipes are located at the perimeter of the pond.
To complete this step, excavate the area using a pickaxe or shovel. You don’t need to make the drench deep since most PVC pipes are durable and can withstand water pressure.
Step 4: Your pond should have three levels of depth. Use a shovel to dig out the pond on its first level at least six inches deep. After this, dig an inner level with the same six inches depth, and then a third level. Use the excavated earth to fill out areas where you want to create the height and curves on the water feature.
Step 5: The next step is to place both filters in their respective areas. Dig out space where you will place the filters and put them in. To ensure that these items won’t move, you can place excavated earth and stones around the area of the top filter. This will make it look natural and pleasing to the eye.
Step 6: Once the base of your waterfall and pond is finished, install the liner and underlayment. Start at the deepest part of the pond going toward its highest level. You can cut out the underlayment later. Also, put the pump near the waterfall filter to ensure that the water will continuously flow.
To create the different depths, place both large and small stones on the pond. This will help keep the liner and underlayment in place and protect these materials from ultraviolet rays. If you’re planning to put koi in your pond, adding stones to it will also encourage microorganisms and algae to develop, giving your pond a natural ecosystem of its own.
Step 7: Finally, fill the pond with water. Create a spillway rock where the water will fall from the waterfall down to the pond. You can use stones to cover the tube so that it will look natural for water running down. Turn on the submersible pump and adjust the strength depending on how you want the water to flow.
Note that the most ideal position of the tubing on the waterfall is in the middle of the spillway to ensure that there’s little to no splashing of water, which may end up creating a mess outside your pond.
Add some finishing touches to your pond by bringing some life into it, for instance, some koi, goldfish, lotuses, and other aquamarine plants to lighten up your backyard.
How to Remove a Backyard Waterfall and Pond
Removing a feature as big as a waterfall and pond can be a difficult task. Thus, we suggest that you bring along some of your family and friends to help out and make this a faster and easier project.
Step 1: Take out some water, as well as all your fish and plants from your pond, and put them in temporary containers. Doing so will avoid shocking your aquamarine animals and plants with the new environment.
Step 2: Disconnect the electrical cords and detach the tubings from the pump.
Step 3: Drain the pond with the water. Like with previous water features, you can use a vacuum to remove the water and debris.
Step 4: Once you’ve reached the bottom of the pond, remove the rocks or any decor. Make sure you put the rocks far enough so you can move inside and outside the pond. Don’t put the rocks right beside the pond to prevent anyone from tripping in it.
Step 5: Remove the underlayment and liner. This is where you’ll need help from a couple of people since the underlayment can be heavy. The liner can be difficult to remove so you can use a chisel and hammer to remove some dirt on its side to make it easier for you to move it.
Step 6: The next step consists of removing the skimmer and biofalls filters. Like with the previous step, you can use a chisel and hammer to remove some dirt on the side. Once there’s enough space, you can lift these filters out. Make sure you put it outside of the pond to ensure that no one stumbles on it.
Step 7: Finally, fill the pond with dirt. You can also purchase sand from your favorite depot store. Just make sure that you have enough sand or dirt to fill out the waterfall and pond area to make your backyard even footing.
Remember to turn off your water pump every night or before you leave your house. This will ensure that there are no connected electrical outlets that may lead to accidental fires. Also, make sure to regularly maintain the cleanliness of your water features. Remove any leaves, bird poops, and other debris that may ruin the beauty of your beautiful decor.
Conclusion
Having a backyard water feature provides a soothing feeling, attracts wildlife, reduces noise pollution, and increases the quality of the air on your property.
When installing a water feature, make sure that you have a concrete plan and layout summing up how you want it to look from the outside.