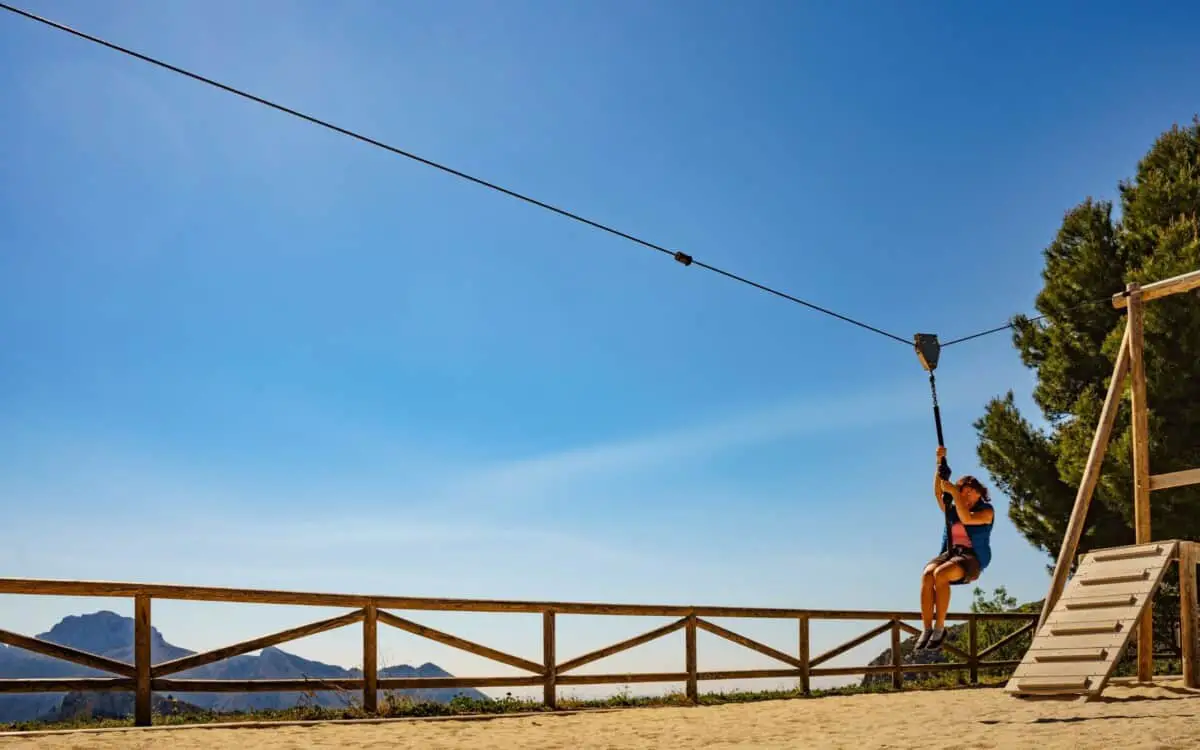
If you are looking for an adventure, ziplining will satisfy your yearning. This fun, exciting, and thrilling outdoor activity will give you a chance to venture while viewing the beauty of nature. It’s an enjoyable way to bond with family and friends while embracing Mother Earth. Ziplining is a perfect activity to set up in your backyard, so there’s no need to travel a long way to enjoy this recreation.
Setting up a zipline is a great project for your backyard as it is small and convenient. But, there are things to consider when doing so. First, you should know the different types of ziplines, as well as the zipline parts and equipment. Next, you should consider the cost of building a zipline, its location anchors, height, and lastly, how to build your zipline.
In this article, we will discuss what you need to know to build a zipline in the backyard. In addition, we will tackle the different parts and equipment of a zipline. These factors will guide you on how to build a backyard zipline.
The Basic Types of Ziplines and Their Costs
Ziplining is a breathtaking activity that brings you closer to nature while allowing you to bond with your loved ones. A zipline is a cable suspended above an incline, to which a pulley and harness are attached to a rider. There are many things you need to know about ziplines. For starters, here are the basic types of ziplines and their costs.
- Basic zipline
A basic zipline is great to build in your backyard and normally costs between $200 and $300, although the cost can go higher if you want additional accessories. Plus, it’s easy to do in a small and place such as your backyard. A zipline for a backyard can be built at a low height and can be installed by connecting trees, tree houses, and other playground equipment.
Generally, your backyard zipline should be 50 to 150 feet tall and carry up to 275 pounds. Putting up a zipline is fairly easy and affordable, but what matters most is the safety of your family.
- Level-two zipline
If you desire extra leisure, it would be great to bring ziplining to the next level by installing a zipline that advances at a faster speed. At this level, the zipline is between 200 and 500 feet high and can still carry up to 275 pounds. Helmets and harnesses are highly suggested for safety. Level-two ziplines can cost around $300 to $500, and extra accessories add to the final cost.
- Level-three zipline
If you still want more adventure and feel an adrenaline rush, let’s elevate the intensity with a level-three zipline. This type of zipline requires higher and stronger trees for the installation. Selecting the perfect location and a big budget are also necessary, as this sort of project costs around $3,000 or more. This type of zipline is primarily a zone in commercial operations, like adventure parks and eco canopy tours.
You can’t build this kind of zipline yourself. As safety is the main priority, you need professionals to install this type of zipline, which is not suitable for a backyard.
Zipline Parts and Equipment
Before the adventure begins, you have to get fully equipped. You should be wearing special equipment for safety purposes. The equipment you wear for this activity is the key to prevent injuries. You must be familiar with the function of each piece of equipment and accessory before you start riding. So, let us begin familiarizing with it:
- Helmet
A helmet’s focus is to reduce the possibility of serious head injuries. Wearing a helmet protects your head from the impact of aerial obstacles like twigs, branches, leaves, and other falling objects. It is crucial to choose one that fits your head properly. Before putting your helmet on, make sure there is no damage to it and securely strap it to your head.
- Harness
A harness is an arrangement of fitting and straps designed to attach or secure a body to another object. It will support your body during your ziplining escapades. Harnesses consist of loops and buckles that wrap around your thighs and waist. They allow you to sit back and are attached to the cable keeping you in place as you glide down from platform to platform. Make sure your harness is free of broken stitching and positioned comfortably before you enjoy the ride. You should sense the feeling of flying because of the weightlessness.
- Trolley
A trolley is a device consisting of pulley wheels that mount on the top of the zipline cable. You need this simple piece of metal to glide down the track. It is accountable for securely carrying a rider through harness handlebars from one point to another.
Every trolley offers a distinct acceleration. These trolleys control your speed as you glide down the cable, ensuring you maintain a safe and proper rate.
- Carabiners
A carabiner is a special type of shackle used to quickly and reversibly attach components in safety-critical systems. Carabiners are generally used for rope-intensive activities, such as sailing caving, climbing, construction, acrobatics, and more. They are mainly made of aluminum and steel, making them very strong and able to withstand even a thousand pounds of pressure.
Carabiners made of steel are commonly used for ziplining. The advantage of these carabiners is that they keep the rope and other equipment safe inside their clutches. These carabiners hook onto ropes, trolleys, and harnesses for safety measures.
- Pulley
A pulley is a wheel that carries a cable, rope, belt, or cord on its rim. It is a simple machine that makes a zipline workable by cutting down the amount of friction resisting a rider’s going down the cable or rope. Various kinds of cable pulleys make use of to lay out the smooth flow of the zipline, where moderate speed reductions are set up. They can be adjusted based on the conditions, such as the rider’s weight and the slope’s steepness.
- Gloves
A pair of gloves is another important piece of equipment that will cover and protect your hands, particularly while gripping and braking. Protective gloves prevent cuts and skin irritation and make your gripping easier. Wear a pair that perfectly fit your hands to prevent them from slipping.
- Brakes
All ziplines need a brake system. Being able to stop is a top priority and a major concern for others, especially for children. There exist various brake systems, including active braking, passive braking, leather glove braking, bungee braking, spring braking, and gravity braking.
Things to Consider When Building a Backyard Zipline
You can’t build a zipline in your backyard without doing some research and planning ahead. There are things you have to check, like, for example, the location of your zipline, the materials used, and the purpose of your zipline. Here are four things you need to consider in building a zipline.
- Cost
As discussed earlier, backyard ziplines may cost you around $200 to $300. Zipline kits are usually the easiest way to build a zipline. They contain all the materials needed to build a zipline. You can buy these in sporting goods stores and online shops.
But, if you prefer, you can seek help from professionals to do the work. You can also build one yourself if you don’t want to hire workers for the job. You can save a lot of money and reserve it for other supplies and accessories.
You have to be wise when choosing the equipment for your zipline. Always remember that the first thing to put in your mind is the safety of your family, so choose durable and long-lasting materials.
- Location
The location of your project is important as well. Since you are building your zipline in your backyard, you have to make sure everything is in place and in the right position. Before a zipline is set up, make sure that there aren’t any objects or obstructions that a rider could hit as they glide along the way. Again, safety is our major concern, aside from fun, in this project. A backyard with trees is the perfect site for it. Trees are an ideal base in the installation of your zipline.
- Anchors
Having trees in your backyard is an advantage. Your zipline will usually be installed between two tall items, like trees. Thus, pick two trees with a direct path toward each other. Choose trees that are healthy and big enough, with a stable soil and root system to support the weight and tension of the cable and rider.
A safe ziplining tree’s trunk must be at least 12 inches in diameter. Adding support to the existing trees is required, but with proper care to protect the root system. If you don’t have any trees at your place, you can use two solid metal poles placed stably in the ground.
- Height
The recommended height for a zipline is 7 feet. This height clearance must be applied around the entire zipline and be free from rocks, branches, or any other objects and obstacles.
How to Build a Backyard Zipline
You are already familiar with and know the function of the equipment and material used in building a zipline. Now, it’s time for you to install it. The following simple steps will guide you on how to build a zipline in your backyard.
Step 1 – Establish the Size and Distance of a Zipline
Determine the size and distance of a zipline. First, establish the size of the cable you are going to use for your zipline. To determine the width or thickness of the cable you want, you must know the total length and weight of the zipline, from one point to another. Search online how to calculate the width of the cable and how much weight it could carry.
If your zipline is less than 200 feet long, you can either use a cable that’s ¼” or 3/16”. These two sizes of cables can hold up to 250 pounds. A sturdy cable is an advantage considering adults will probably want to try it.
Step 2 – Straighten and Cut the Cable
Lay and straighten the cable on the ground between the two objects — ideally, trees or other solid structures. Swaddle the cable around the tree to figure out the exact length of the cable you need. Cut the cable slightly longer to its right length, just in case you need a little adjustment.
Step 3 – Create a Protection Block for the Tree
Put some protection blocks when you swaddle the cable around the tree. Place protective blocks under the cable so it will not harm the tree. These will protect the tree from further damages caused by the stretching of the cables. Take out twigs and branches that hinder the way. You won’t like it if they are scratched by the branches while mounted on the zipline.
Step 4 – Loop and Fix the Cable on the First Tree
Swaddle the cable around the tree protection blocks and fix it with four cable clamps. The loop around the first tree must be uncomplicated. Choose the right size of clamp that matches the cable’s diameter. Use durable and heavy-duty clamps for safety.
Step 5 – Tug the Zipline with a Cable Winch Puller
The second loop around the tree is a bit more difficult. First, insert the trolley onto the zipline before attaching it to the second tree. Next, take the winch puller, swaddle the cable around the tree, and position the hook over the cable to fasten itself. After that, cut a cable part of about 5 feet and make a loop end on one end of the cable.
Then, position the loop end into the hook of the winch puller. Straighten the zipline with your hands as much as you can, and then, attach this short piece with the cable clamp to the zipline. Now, use a winch puller to tug the zipline hard.
Step 6 – Create a Cable Sling and Swaddle Around the Second Tree
Create a cable sling for the second tree attachment while the zipline is stretched with a winch puller. A cable sling is a short part of a cable that swaddles around the tree with two loop ends. Swaddle the sling around the protection blocks and attach these two loop ends to the turnbuckle.
Keep the turnbuckle unfastened most of the time as it makes the turnbuckle long. Next, get into the zipline cable through the second end of the turnbuckle and create a loop end with cable clamps and thimble. Once the sling, turnbuckle, and zipline are all attached, set the pressure free from the winch puller. It will slack the zipline a bit, but everything will be attached.
Step 7 – Put Up a Seat for Your Zipline
There exist many seat designs, from swings to disc seats, trolleys, spare tires, or harnesses. Choose what you think is best for your family, and especially your kids.
Step 8 – Make a Ladder and a Platform for Tree Stand
You need a ladder and a platform to get up to the seat because the zipline’s beginning is elevated from the first tree and descends toward the second one. Build something permanent and sturdy for your kids’ safety.
Conclusion
Ziplining is an extremely fulfilling experience. As you ride across the trees, you may face mental and physical challenges that you will have to overcome. You have to conquer your fears, especially if you have acrophobia. You will sense a feeling of success after a long ride. Backyard ziplines allow your family, especially the kids, to enjoy and have fun without going anywhere.