An outdoor kitchen transforms your backyard into a functional entertaining space. Instead of running in and out of the house, you can cook, prep, and serve food entirely outdoors.
Building an outdoor kitchen requires planning location, utilities, materials, ventilation, budget, and permits—especially if you include gas, plumbing, or electrical lines.
Here’s a practical guide to designing and building one properly.
Step 1: Choose the Right Location
Placement determines convenience, safety, and long-term usability.
- Keep it close enough to the house for convenience.
- Avoid placing it directly against walls where smoke can enter windows.
- Consider prevailing wind direction.
- Plan seating and dining layout before finalizing location.
Most homeowners position outdoor kitchens near patios or existing seating areas.
Step 2: Decide on Heat Source (Gas vs Charcoal)
Gas Grill
- Quick startup
- Easy temperature control
- Convenient for frequent use
Charcoal Grill
- Stronger smoky flavor
- More hands-on control
- Slower cooking startup
Many outdoor kitchens integrate both.
Step 3: Plan Utilities (Electric, Gas, Water)
This is where projects become serious.
- Electricity: Required for lighting, refrigeration, outlets.
- Gas lines: Needed for built-in grills.
- Water lines: Required if installing a sink.
Licensed professionals are recommended for utility installation.
Step 4: Understand Permit Requirements
Small, movable setups often require no permits.
However, permits are usually required if you:
- Install permanent gas lines
- Add plumbing
- Build roofing structures
- Run new electrical circuits
Always check local building codes before construction.
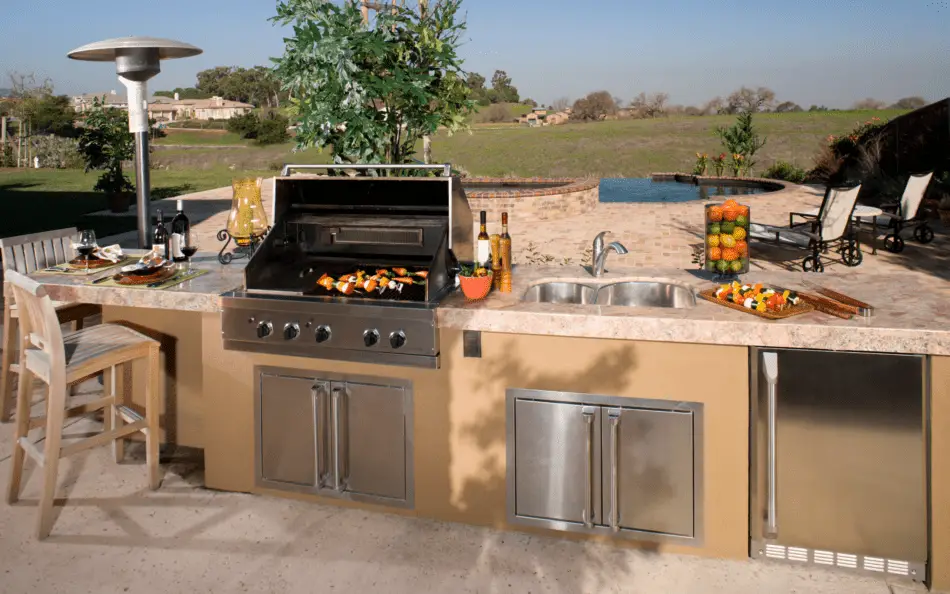
Step 5: Choose Durable Materials
Outdoor kitchens face sun, rain, wind, and temperature changes. Choose materials designed for exterior use.
Best Material Options
- Stainless steel: Ideal for appliances and cabinetry.
- Stone or brick: Durable and heat-resistant.
- Concrete: Long-lasting and modern.
- Granite: Popular countertop option.
- Weather-resistant wood: Requires maintenance.
Avoid indoor-grade cabinets and untreated wood.
Step 6: Plan Counter & Prep Space
A common mistake is underestimating prep space.
As a rule of thumb:
- Allow at least 24–36 inches of prep space beside your grill.
- Include separate zones for cooking and serving.
Step 7: Flooring & Drainage
Choose non-slip, weather-resistant flooring such as:
- Outdoor-rated tile
- Pavers
- Stamped concrete
- Natural stone
Ensure proper drainage to prevent water pooling.
Step 8: Add Lighting & Shade
Lighting is essential for evening use.
- Install task lighting over prep areas.
- Use softer ambient lighting for dining areas.
Consider adding:
- Pergola
- Roof extension
- Retractable shade
How Much Does an Outdoor Kitchen Cost?
Costs vary significantly based on size and complexity:
- Basic DIY setup: $1,500–$5,000
- Mid-range built-in kitchen: $7,000–$15,000
- High-end custom kitchen: $20,000+
Utility installation and premium materials increase costs significantly.
Can You Build an Outdoor Kitchen Yourself?
Yes—if you plan carefully and understand your limits.
DIY is realistic if:
- You use a freestanding grill.
- You avoid major plumbing or gas line work.
- You build simple masonry or cabinet structures.
For gas, plumbing, and electrical work, hiring professionals is strongly recommended.
Final Thoughts
An outdoor kitchen adds functionality and value to your backyard, but success depends on proper planning. Focus on location, materials, safety, and realistic budgeting.
Start small if needed. A well-designed compact kitchen often outperforms an oversized, poorly planned one.