Do you find it challenging to keep your mulch in place until the following season? It is often a very frustrating situation, especially when you anticipate heavy rains soon. So, how do you keep your mulch from washing away?
To keep it in place, you must get it right from the first step. Pick the best (heavier) mulch, get the right amount, choose the proper time to lay it, and lay it down carefully. You also need to maintain and care for it throughout the season.
This article takes you through all you need to know about keeping your mulch in place and as well as how to maintain it.
How to Ensure Your Mulch Stays in Place
Keeping your mulch in place can be quite a chore. Here are the things that you can do to make sure that your mulch stays where it belongs.
Choose the Right Mulch
You can use two types of mulches in this scenario, organic and inorganic.
-
Organic Mulch
Organic mulches range from grass clipping to wood chips, straws, compost, and chopped leaves. You have to select the best option for your lawn.
Any organic mulch makes an excellent choice since it naturally breaks down to add nutrients to the soil beneath the grass. It also helps with water retention, protects your plant roots, and prevents weeds from invading your plants.
On the flip side, organic mulch won’t protect your plants from pests. You might also need to replace or add more organic mulch at least once a year.
-
Inorganic Mulch
If you want to improve the aesthetics of your backyard with a decorative look, inorganic mulch is the best option. It comes in different forms, including tumbled glass, river rocks, stones, and gravel. Inorganic mulch helps retain moisture, regulates moisture content, and prevents weed germination. However, it is less effective in doing so than its organic counterpart.
Inorganic mulch does better because it comes in various colors and styles that will fit any decorative purpose. For example, you can choose the style and color that best matches your yard’s colors and theme.
Get Enough Mulch for Your Area
You must determine the amount of mulch you need for your space. Some online calculators will help you determine this, but you will have to know the exact area to cover.
Most stores sell mulch in ‘yards,’ with one yard carrying enough mulch to cover a 100-square-foot, 3-inch-deep space.
If you intend to use the mulch to control weed growth, apply it in piles, making it 2 to 4 inches thick. However, if you want to use it on a vegetable bed, you must give it a depth of about 4 to 6 inches.
You must only apply the amount of mulch your plants need to thrive, as too much mulch suffocates the roots and may kill your plants.
Pick the Right Time to Apply Your Mulch
Late spring to early summer is the best period to apply your mulch. During this time, you have perfectly warmed up the soil with plants just getting out of dormancy. However, you can always lay your mulch at other times of the year, depending on the urgency.
Most people believe that applying mulch in the winter helps prevent the soil from freezing. However, it is nothing but a mere misconception. Mulch makes the freezing process more gradual, reducing the freezing cycle and producing a more conducive environment for the plants.
When laying your mulch for winter protection, make it to 2 to 4 inches deep. You can always use inorganic or organic mulches for this purpose.
I recommend that you add organic mulch to newly planted trees and shrubs to maximize the essential nutrients. This type of mulch will also shield your tender plants from weeds. You cannot achieve this with inorganic mulch.
Choosing the right material for a driveway can be very time-consuming if you don’t know what you are looking for. The easiest way is to go for standard concrete or asphalt driveways, although several alternatives are considered better and more durable, like mulch. Is mulch good for a driveway? Read our article to find out.
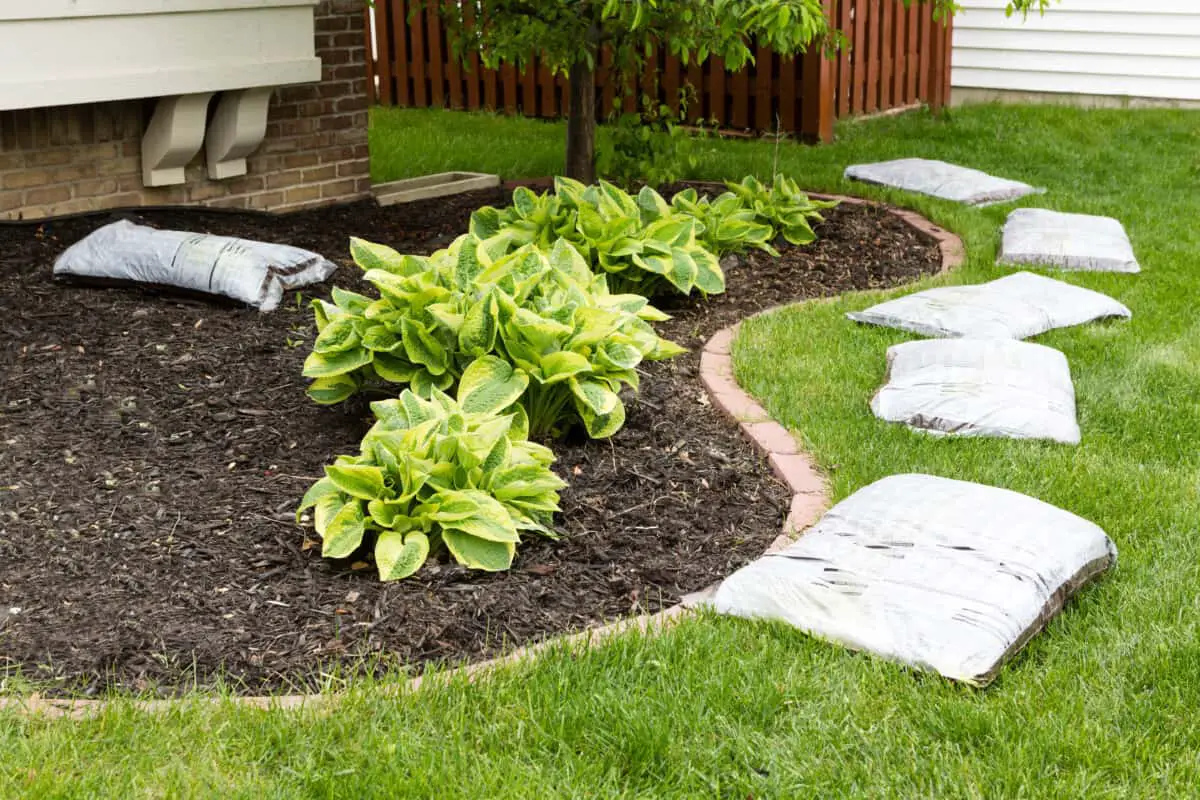
How to Lay Down You Mulch So That It Won’t Wash Away
You can pick the best mulch and lay it down during the ideal season, but water will still carry away the material if you do fail in the laying process. Here is how to properly lay down your mulch so that it stays on the bed.
Step One: Remove Any Available Weed
With a garden spade, dig out all the weeds in the garden, making sure that you get to the roots. Doing this will ultimately kill the weeds and ensure they do not grow back under the mulch.
You can also use chemical weed killers instead of digging them out. Be careful about the kinds of chemicals you use. Indeed, selective weed chemicals will only eliminate the subject weeds and grasses, while a non-selective weed chemical will destroy any plant that comes into contact with it, including what you planted. Therefore, they are not the perfect choice when you want to preserve certain plants.
Step Two: Create an Edge for the Mulch
Use a manual edger or shovel to carefully dig around the circumference of the place you want to lay your mulch in. Doing so creates a distinction around the bed, separating it from the surrounding grass and weeds.
While creating the edge, be careful not to toss the soil into the bed as it may transplant unwanted grass.
Instead of digging, you can also create the boundary by lining the area.
Step Three: Prepare the Lawn or Flower Bed
Before laying the new lawn, prepare the bed by removing the old mulch. You can always top up the mulch if you apply a similar type to the previous one, but you will have to smoothen it a little.
If you want to lay an entirely new type of mulch, take a shovel to dig away the existing mulch and use it in your compost.
After that, shovel some piles of mulches onto the lawn or bed. You can do with three or four piles before skipping to the next. Doing this ensures that you only put enough not to suffocate the roots of your plants.
Step Four: Rake the Mulch Over the Surface to Form an Even Layer
Rake the mulch you just shoveled. You can do this in the summer or spring, but you have to create a layer that is 1 or 2 inches thick.
Inorganic mulch is a bit easy to handle, so you can spread it with your hands instead of using a rake. You will also need a 1-inch space between the mulch and the plants or trees.
Step Five: Water Your Mulch
This step is only necessary if you are using organic mulch. Use a garden hose or a bucket of water to water the new mulch. Doing so provides moisture content and prevents it from blowing away.
While doing this, be careful not to flood the mulch with water as it may affect your plants.
How Do You Maintain Your Mulch To Make It Last Longer?
After doing all that and laying your mulch as described above, make constant efforts to maintain your mulch. If well-maintained, some mulches can last up to a decade before you have to replace them. Here is what you need to do to maintain a perfect flourishing mulch.
Remove Weeds
Mulch is excellent in keeping off weeds but will only do so after some time. Thus, you must find other ways to help control weeds from the beds.
-
Add Another Layer of Mulch
The first method consists of adding more mulch when you notice weeds begin to grow from the existing pile. The mulch will suffocate the weeds and deny them the sunlight they need to thrive. Coarse chopped or shredded mulch is a perfect option if you want to kill weeds.
-
Pull the Mulch Out
The second method consists of pulling the weeds with your hands as soon as they emerge from the mulch. This may be a tedious project, so you must do it before the weeds grows in uncontrollable numbers. A single weed can produce several seeds. Thus, procrastinating may leave you with a full bed of weeds. Besides, grown weeds compete with other plants for the limited natural resources, and in most cases, win.
Use Herbicides
You could also use pre-emergence herbicides to prevent weed germinations. However, you must note that these herbicides won’t help with mature sprout weeds. Use post-emergence herbicides in this case.
To apply the pre-herbicides, you will need to rake your mulch, pull the sprout weeds away, and use the proper chemical, according to the manufacturer’s instructions. For the best results, please replace your mulch after applying the herbicides.
Herbicides can be dangerous to your plants, so be careful about what you use.
Mix and Turn Your Mulch
Mixing and turning your mulch should be a seasonal routine. Doing so breaks up the clustered pieces, ensuring it doesn’t form compact layers on top of the soil.
Mulch Twice Every Year
Your mulch layer thins out after some time. Therefore, it would be best if you made it a habit to add mulch to the existing one every time this begins to happen. Also, get accustomed to replacing your mulch once it begins to break apart whenever you touch it since, at this point, it is no longer effective. For the best results, always replace your mulch in the spring or early in the summer.
It is not a complicated step as you only need to rake the mulch and break up the clumps. Depending on your situation, you may need to spread new mulch on top of the old one to maintain the depth. While doing this, make sure to keep about an inch between the mulch and stems or trunk.
Refresh the Color
This process is indispensable if you are using inorganic mulch. Indeed, mulches tend to lose their colors with time due to prolonged exposure to sunlight, thus turning greyish. Black or brown mulches are also prone to fading if you fail to maintain them correctly.
You can hide the faded mulch by topping it up with a thin layer of fresh mulch. But, it would help if you examined the extent of the damages in your old mulch before deciding whether to top it up or entirely replace it. During the examination, you should assess how long it has been since the last replacement, the depth remaining, and whether or not the current mulch is already decomposing.
If the old much is decomposing, there is no point in refreshing its color. The rotting means that it is no longer effective, in which case it is best to replace it altogether.
Also, be careful not to add too many layers, as they may suffocate and kill your plants’ roots. Indeed, too many layers make your mulch water-repellent or hydrophobic, which is not ideal for your plants.
Why Does Your Mulch Wash Away?
Mulch, in most cases, washes away during heavy rainfall or irrigation projects that produce a stream of water that is too strong. Other elements will also factor in, like the type of mulch you use, the season in which you apply your mulch, and how you do it.
How Do You Lock Mulch in Place?
The following sections expand on the several ways to lock your mulch.
Use Mulch Lock
The most effective way to lock your mulch is to place it using a mulch lock. It is a ready-to-use spray with a patented formula that works as a bonding agent to stick the mulch particles together.
Here is how to use it.
- Step One: Shake your mulch-lock formula and pump it to mix it well.
- Step Two: Completely cover your mulch with the sealer until the entire surface turns white.
- Step Three: Let your mulch anchor dry for about 4 to 6 hours for the solution to completely set in. At first, the spray will appear white and milky, but will eventually turn completely clear after this duration.
Although the bonding work will be effective instantly, it reaches its peak after about 24 to 48 hours. For the best outcomes, apply it when the mulch-lock product, air, and ground cover temperature averages at least 55°F. Also, make sure to do it when the air is calm and there is no rain announced within at least 24 hours.
Apart from using a mulch lock, you can also apply the following tips.
Do Not Apply Mulch on Landscape Fabric Underlay
Landscape fabric underlays and lumber tarps create smooth surfaces for the mulch to slide. They are great when it comes to preventing weed growth but don’t work well in holding mulch. Placing mulch on them provides an easy way for the content to wash away when it rains. The effects are always more rampant if the soils are not flat.
Install a Perimeter Edge
You can also lock your mulch in place by constructing a perimeter with edging materials like wood, stones, or plastics, along the circumference of your bed. Alternatively, you can also plant perimeter plants, such as sweet woodruff, creeping thyme, and hostas. Doing so creates a physical barrier that keeps your mulch within a limited space.
Place the Mulch in Layers
Instead of dumping the mulch in piles at once, do it gradually and in layers. For example, you can be adding an inch of much to your garden every spring or fall. The thin layer allows the new mulch to quickly blend with the soil structure via natural processes like foot traffic, snowmelt, and soil life.
Applying mulch in one go benefits the plants, whereas doing it in thin layers compresses and eliminates the excess air helping it stay put.
Mulching provides a lot of benefits to your yard and garden, such as enriching the soil if you are using organic mulches and preventing the growth of weeds. Mulching is typically done over soil, but can you mulch over rocks? Read our article to find out.
How Do You Choose the Right Mulch?
The type of mulch you apply will determine whether it stays in the garden or easily migrates away from your garden bed. For instance, lightweight, chunky mulch is most likely to float and migrate, even with the slightest wind. On the other hand, heavier mulches, especially matting types and fine wood mulches, show better resistance against the wind and are easy to keep in place.
Here are some of the most common mulches and how they rank when it comes to staying in place.
Shredded Bark and Wood Mulch
These types of mulches are a great choice if you want something that stays in place for a long time. Shredded bark and wood mulches have long, thin fibers that mat down and intertwine with each other, helping them stay put.
Pine Straw Mulch
Like shredded wood mulch, pine straw mulches have needle-like pine threads that entwine with each other and sit on the bed. This mulch also breaks down with time, creating an internal soil structure as the components decompose.
Pine straw mulches are common in areas with native conifer trees and other woodland gardens.
Pea Gravel
This is a heavier mulch, primarily used between garden beds and along pathways. The rock-type mulch is heavy enough to stay in place for a long time. A few rocks may shift positions, especially during heavy rains, snowmelt, or human activities like yard soccer, but a larger amount stays put.
Pea gravel comes from nature, in areas where flowing water once molded the tiny stones into round shapes. The natural weathering process smoothens the surface of every stone, giving it a pleasant texture to walk on.
Compost
Homemade compost acts as an excellent organic mulch. It contains all the ingredients that your topsoil needs to supplement your plants with abundant nutrients. It may be lightweight but features fine textures and the typical internal mulch fabric. It is an excellent choice if you are operating on a budget but are in dire need of mulch. Compost will stay on the bed for a very long time.
Conclusion
Adding mulch to your garden is an excellent idea because it helps keep your soil and plants healthy while increasing the visual appeal of yard. One of the primary roles of mulch, whether it is organic or inorganic, is the prevention of weed growth in your garden beds. For mulch to be able to do this function properly, it needs to stay in place.
One of the challenges that you will face when it comes to mulch is its tendency to be washed or blown away. Heavier mulches can stay in place without much intervention, but if you are going for lighter kinds of mulches, you need to do something to prevent it from being washed away by rain water or being blown by strong winds.
The things that you need to do to keep your mulch in place depends on the kind of mulch that you have in your garden. To minimize the chances of your mulch being blown or washed away, you need to pick one that will be perfect for your location. There are also several ways for you to lock your mulch in place. All you need to do now is find the one that will work best for you.