Clearing rocks from an area is both expensive and tedious. But at the end of the day, you still need to make use of the land, so what do you do? You mulch over the rocks. This process will not only save you money but will also prevent weeds and grass from growing underneath the rocks. Plus, mulching has also been known to improve the performance of the soil. But, how do you put mulch over the rocks?
There are several ways to do so and make your soil more productive. One of the most common methods is to use wood as it is cheap, easy to use, and extremely effective. To proceed, start by pulling out weed and clearing off debris before laying the mulch in consistent layers.
Ensure that your mulch is thick enough to prevent sunlight from penetrating the soil. This will also discourage any weed and grass from sprouting through the rock openings. Doing this will also make it easy to pull off any weed that manages to shoot the mulch since the weed is weak and does not have a stronghold on the roots.
Landscaping with wood mulch depends on the land you are working on and your intentions. Are you planning on planting some flowers and trees or do you just want to keep the place free of vegetation? Whatever the case, I have compiled a whole lot of information to help you out. Keep scrolling to read more on this topic.
How to Cover Landscaping Rocks?
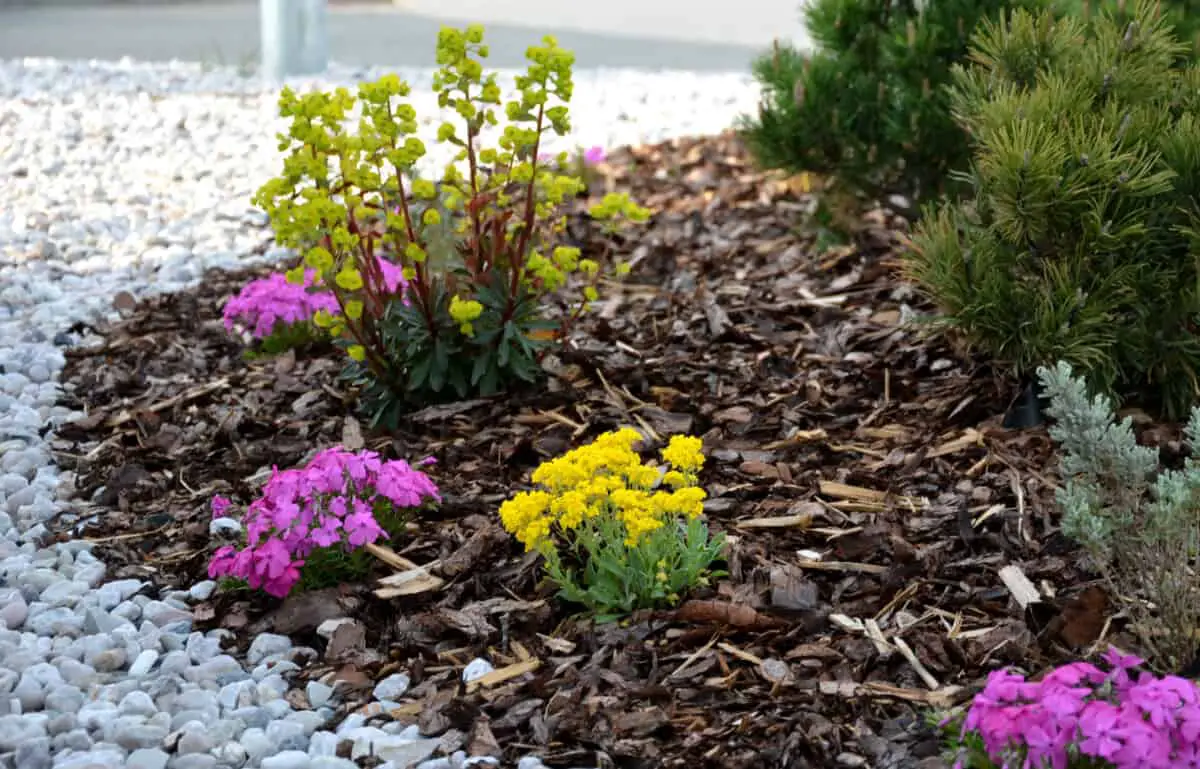
Besides using wood for mulching, you can also use landscaping fabric. They both work perfectly well. Landscaping rocks can offer your lawns and gardens an exquisite look since they come in interesting and delightful colors and shapes. They are designed to complement and improve the beauty of your backyard.
Laying down your landscaping rocks well can and will outlive your generation and the next one. Just make sure to give it tender love and care to keep it looking new and fresh.
- Measurement is a crucial detail when it comes to landscaping. Thus, measure the part you wish to landscape as the amount of rocks to be used should be proportional.
- Create edges around the area you want to landscape. You can use an edger to make a perimeter line all around it. Remove the turf from the bed to prepare it for the landscaping rocks. Perhaps you should consider using a hoe for this purpose.
- How deep you should dig solely depends on the number of rocks you will put in the bed. No matter what, always remember that the rocks should be slightly above ground level. You should leave a few turfs for the rocks to adhere well to the ground.
- Compress the soil on the bed. As time goes by, you might notice that your brimming landscaping rocks are slowly receding to the ground. Tamping down the soil will prevent you from having to add rocks to the bed from time to time.
- When your soil is satisfactorily compressed into the bed, it is time to introduce a barrier. You can either use wood, newspaper, or landscaping fabric depending on your preferences. Lay down either of the three to discourage weeds and grass from sprouting beneath your landscaping rocks.
- Once you have laid the barrier on the bed, you can go ahead and install your landscaping rocks. Pour them onto the bed in mounts and use a rake to even them out. Use the rake to correct any inconsistencies on the bed.
- Your landscape bed is now ready. All you have to do is give it that tidy attractive finish. Pour water generously over the rocks to clean off dust and mud by seeping them into the ground. This will bring out the natural color of the rocks and expose the defined shapes.
- You are now ready to use your landscape bed in whatever way pleases you. You can introduce equally beautiful flower beds to them or turn the place into a lounge spot. If it is near a relaxing patio, try to make it more interesting by throwing in furniture.
Voila! Behold your landscaping rock bed.
Do you find it challenging to keep your mulch in place until the following season? It is often a very frustrating situation, especially when you anticipate heavy rains soon. If you want your mulch to stay where it is, read our step-by-step guide to preventing mulch from washing away.
How to Replace Rocks with Mulch?
You may use both mulch and rocks at the same time for landscaping. In fact, it is very cheap and easy to do. They are both excellent for suffocating unwanted growth underneath your beds. If you want to transition from rocks to mulch, you can simply remove the rocks and replace them with mulch.
- Remove the Rocks
Whether you are tired of the rocks in your garden or have a compelling reason for replacing them with mulch, go ahead and do so. It is your garden and you have the right to introduce whatever you like to it. Gently pick the stones from the beds. If the bed is too large and the rocks too numerous, use a rake to gather them on one side of the bed.
- Pile the Rocks
At least, you don’t want to dispose of your landscaping rocks. They can be extremely useful in other parts of the compound. Shovel the rocks into the wheelbarrow and pile them in a safe inconveniencing corner as you figure out where to use them next. Although, don’t leave them piled for too long as they might begin to fall off and scatter all over the lawn.
- Put a Barrier on the Clean Bed
Your bed is now clean and clear of any rocks. Introduce a barrier on the clean bed to minimize the growth of weeds and grass through the mulch. Consider using either newspaper pages, landscaping fabric, or even wood. The barrier is supposed to block the sunlight from reaching the soil, thus discouraging and smothering any potential unwanted growths.
- Lay Your Mulch
Once the whole ground is covered with mulch, it is time for mulching. Scoop the mulches with a shovel and place them in mounts. We recommend you use natural and organic mulch to maintain the quality of your soil. Use a rake to evenly spread the mulch all over the bed. Ensure that the leveling is consistent with a commendable layer.
- Shape the Edges
The edges of your landscape bed should be slightly raised above ground level. Carefully work on the edges to discourage any weed or grass germination. Edging the beds will also help pull out any sprouting unwanted growths. If the area you are working on is small and manageable, you can simply use a shovel. However, you might need an edger.
How Much Does It Cost to Replace Rocks with Mulch?
Using rocks for landscaping is always costlier than mulching. However, the price of rocks varies depending on the size and design you choose to use. In a rough estimation, landscaping rocks will cost you up to three times more than mulch. Therefore, replacing rocks with mulch will be more cost-effective.
Using mulch that will rot and disintegrate over time, like wood, is much more beneficial. In the process of breaking and rotting away, it will enhance the quality of your soil and increase its nutrients.
How Much Does Wood Mulch Cost?
The cost of wood for mulching depends on your location. You can get some in sizable bags. However, if you intend to cover a large area, you can easily get them in huge bulks.
A small bag of wood mulch normally equals 2 cubic feet. If you are going for hardwood mulch, each bag will ultimately cost you between 3 and 4 dollars. However, if you are looking at high-quality, more durable cedar, you will have to part with $7 for a 2-cubic-foot bag.
Overall, buying in bulk is a better deal, but if you have a small space to landscape, there is no need for that much. A bulk would roughly cost you between $15 and $40 per cubic yard. This will cover up to 100 sq. ft. of your garden.
You might also want to consider the shipping fees, which can cost $20 to $100. But again, it depends on your location and the amount of mulch you need.
Wood Mulch: Pros and Cons
There are always two sides to every coin: tail and heads. The same goes for everything else. There is always a strength and weakness to a product. That includes your yard wood mulch. Here are the pros and cons you should consider before investing in this product.
Pros
Wood mulch is organic, as opposed to landscape fabrics and plastics. Using wood mulch will boost the nutrients in your soil, which will help your vegetation thrive and bloom as it will be well fed.
Wood mulch is excellent for your soil during both the cold and hot seasons. It helps regulate its temperature, reduces heat loss, and acts as an insulator in the winter. During lukewarm seasons, like spring, wood mulch will warm up your soil.
Cons
However, wood mulch is not as durable as landscaping rocks. With time, it tends to rot and eventually disintegrate into the soil, meaning you will have to replace it regularly, unlike rocks.
Depending on your location, wood mulch is most likely to attract pests, the most common being termites and ants. This will eventually decrease the life of your wood and force you to replace it regularly. Therefore, if you live in a pest-prone area, you might want to consider other options.
How Much Does Rock Mulch Cost?
As mentioned earlier, rock mulch is much costlier than wood mulch. A ½-cubic-foot bag will roughly cost $4-5. The cost will also depend on the size and quality. These bags are way smaller than those of wood mulch. If you are investing in bulk, you will have to part with $40 to $110 per cubic yard. This will be enough for 100 sq. ft. with a 3-inch layer.
This method is inorganic, and you must think through it before investing. Inorganic rocks will seal the soil, thus preventing any unwanted growth. It restricts the regulation of air and sunlight deep in the soil, which are necessary for germination.
Overall, this method is more durable and reliable than using wood mulch. In fact, you might never need to replace rock mulch as it neither rots nor disintegrates. It also gives you interesting shapes and colors to choose from. Thus, you can pick dull to bold colors depending on how you want your garden to look like.
Rock Mulch: Pros and Cons
Just like wood mulch, this method has its ups and downs. However, it is nothing that can’t be surpassed, otherwise, this method would not be listed as a rock mulch. As easily accessible and durable as it is, it has its flip side, which gives wood mulch the upper hand.
Pros
Unlike wood mulch, rock mulch is highly durable and stays put for a longer period. It doesn’t break down and you will not be replacing it season after season. If you must do something, perhaps it would be adding more stones to the bed, especially if the soil is loose and has sunk lower.
With rock mulch, you have interesting choices on hand. Indeed, these rocks come in various shapes, sizes, and colors. They offer warm and laid-back colors as well as bold and more eye-catching ones. The ultimate result depends on your preferences and what would best complement your yard.
Cons
Rock mulch does not add any value to your soil, unlike wood mulch, which provides nutrients. As much as it is harmless to your plants and flowers, it won’t give them anything valuable back to enhance their beauty.
Besides, it is heavier and more tedious to work with. Raking rock mulch to level it in the bed requires extra effort as it is heavy to move, lay, and spread.
Finally, rock mulch is not good at regulating your soil temperature. It is meant to hinder and smother any unwanted growth, which is exactly what it does. It blocks both the air and sunlight from penetrating deep into the soil.
Choosing the right material for a driveway can be very time-consuming if you don’t know what you are looking for. The easiest way is to go for standard concrete or asphalt driveways, although several alternatives are considered better and more durable, like mulch. Is mulch good for a driveway? Read our article to find out.
How to Pick the Right Mulch?
Before picking mulch for your yard, there are a couple of things you ought to know, for example, the type of soil in your yard. Does it retain or drain the water first? How loose is it, and what is its PH level? With these and more questions answered, you can confidently choose the proper mulch.
If your yard tends to pool with water, especially during the rainy season, you might want to consider using hardwood mulch. The shredded ones are way better due to their size as they are not easily swept away when there is water pooling. After all, they can fit and stay put in the grooves.
On the other hand, if you are working on a bed with landscape rocks, you might have to make different choices. In this case, pick wood mulch, which has much smaller splinters. It will help it fit nicely on the rock spaces created by the rocks. Most people prefer pine nuggets for this method. They provide excellent coverage and are easy to use. Besides, they are more durable and of perfect size.
Always edge the beds after mulching by creating a distinct perimeter ridge. This will help prevent your mulch from being swept away, especially when it floods. Indeed, you do not want to wake up the next day to a bare bed.
What Is the Best Color of Mulch?
There are three particularly popular mulch colors you can choose from, although they’re not the only options. These colors are dyed, and they are very attractive. However, the one you end up picking depends on the outlay of your yard and what works best for you.
- Red Mulch
This color is mostly used in commercial areas. It strikes an excellent contrast with light plants around the looming office and complexes in uptown. This vibrant mulch contains iron oxide dyes and may also contain soy and other vegetable-based foods that tend to decompose more quickly.
- Brown Mulch
This mulch will give your yard a vibrant touch. This color is in its natural state and you, your plants, and the yard itself are going to love the vibes it brings to it. It contrasts perfectly with both light and dark plants. On the flip side, this beautiful color tends to fade just after one season.
- Black Mulch
That is yet another staple for commercial sites. However, this mulch is not ideal for places with delicate plants. If you live in a cool region, this mulch will thrive and retain its deep, beautiful black color. On the other hand, using it in hotter climates will interfere with the growth of your plants.