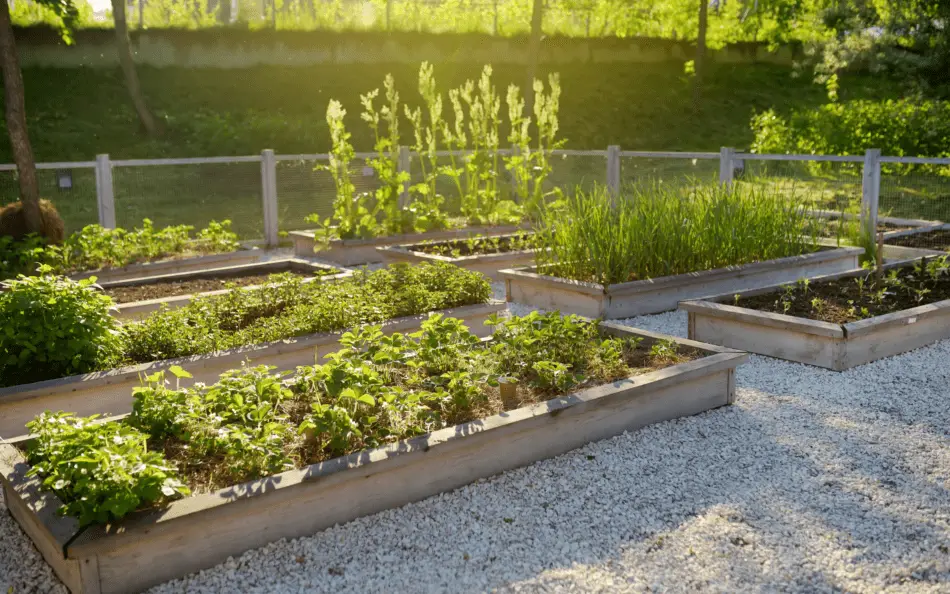
How to Properly Layer and Build a Raised Bed Garden Base


How to Properly Layer and Build a Raised Bed Garden Base

More and more backyard gardeners are exploring various initiatives to make their plants grow healthier. In recent years, you’ve started finding gardens filled with raised beds and an array of plants and vegetables that allow the greenery to flourish in healthy soil and away from weeds and insects.

Raised beds are elevated garden boxes that separate small groups of flowers and vegetables. To build a raised bed, you’ll need the right wood, to create a good drainage system, make the bed sides, assemble all the materials, and fill the bed.

You may use many materials to build a raised bed garden base. However, choosing the right ones will allow your plants to thrive longer with little to no treatment. Additionally, making a raised bed is easy enough for you to do it yourself in your backyard.

In this article, we’ll guide you step by step on how to layer and build a raised bed for your garden. Using a raised bed with healthy soil above your regular backyard soil, you can prevent the pathway of weeds, provide better drainage, prevent soil compaction, and block insects from coming into your plants.


Factors to Consider When Building a Raised Bed

To protect our plants from poor soil, insects, and weeds, we must put them in the right area and provide them with everything they need. In this section, we’ll discuss the things that you should consider before building a raised bed garden base for your plants.

1. Site Selection

Not all plants require the same exposure to sunlight. Before building a raised bed, study your current vegetables and flowers and learn how much sunlight each one needs. Separate the plants that need different exposures to sunlight. You can create another set of raised beds and put it in another area of your backyard.

If your plants need direct sunlight for 8 hours a day, you can put your raised bed in the middle of your backyard, where it can collect sunlight from morning until afternoon. However, if your plant only needs partial sunlight or partial shade, you can put it under a tree. If it either needs morning or afternoon sunlight, you can put it beside your house or fence to ensure that it blocks the sunlight it doesn’t need.

2. Choosing the Right Wood

The kind of wood that you choose will ultimately depend on your area and weather conditions. Most gardeners use cedar for garden beds because it is naturally rot-resistant and can last for decades. However, there are still many types of cedars to choose from.

Redwood is a great rot-resistant wood but is considered a limited resource. The most commonly used cedar is western red cedar because of its availability and natural color. Juniper, Port Orford (yellow) cedars, and Vermont white cedar are also great choices to make raised beds.

3. Creating Drainage

Having the right drainage for your raised bed is crucial to ensure that your plants won’t develop diseases nor deprive their roots of oxygen. When building your raised beds, allot some space for your drainage or create a slope where excess water may flow through.

If you choose to create a slope, make sure it’s only about 2% on a horizontal distance. The slope should be away from the center of the raised bed and from any structure. You may install special drains on the side walls to create a drainage channel.

You can also dig a trench going in the direction that you want the water to flow. You may also use coarse stones and tubing on your trench and cover it with soil. Another alternative is to apply a French drain, with which you get to create a narrow trench, fill it up with coarse stone, and direct it to a lower elevation.

4. Deciding What Irrigation to Use

With the use of technology, gardeners have gathered more and more options to use on their irrigation systems. Automated sprinkler systems, pop-up stationary risers, low irrigation systems, and hose systems are all great options if you’re looking for a less tedious approach. Also, these systems ensure that your plants get the right amount of water at the right time. However, all these options have their disadvantages.

First, you won’t be able to control these automated systems. If it rains, it will still water your plants, which wastes water. Additionally, any of these systems will put moisture in your wood, which can lead to faster degradation. Lastly, all these options involve tubes and wires, which are prone to clogging and getting damaged by rodents.

Hand-watering remains the best option, but it means you always have to do the watering yourself. Therefore, you need to spend more of your time watering your plants and make sure that the cedar wood won’t get wet. Also, while it can be a bit tricky to gauge how much water your plants get when the system is automatized, when hand-watering, you know exactly better how much water each plant receives.

Divide your plants depending on their watering needs, the water pressure, water flow, and the overall size of your system. Zone watering is essential to ensure that your plants get the amount of water they need.


Backyard gardening has enabled many people to create their own sources of food, minimize their stress level, improve their mood, exercise, maintain good mental health, create relationships and a community, and so many more. Here are 12 reasons why backyard gardening is important


Step-by-Step Guide to Build a Raised Bed

Now that you know where to put your garden boxes, what wood to use, what drainage system to install, and how to design your drainage, it’s time to build your raised bed.

Tools:

  • Screwdriver, drill, driver, and bits
  • Tape measure
  • Hand saw

Materials:

  • Exterior screws and deck
  • 1×1-inch pine stake with 3-foot length. Before starting, cut the stake into four pieces as you’ll be using them on the corners of your garden box for bracing.
  • Two 2×6-inch cedar boards, depending on the type of cedar that you choose. Most cedar boards are 8 feet long, which is perfect if you’re building 4×4 footbeds. If you want a 4 feet long garden box, you’ll need to cut the boards in half.

Step 1: Make the bed sides

  1. After cutting your 8 feet long cedar boards, drill into the planks using decking screws, and make them slightly thinner than the screws. On each side of the plank, drill two holes using your drill bit. Overlap each plank with each other to ensure that all holes align.
  2. To create a sturdier frame, use the stakes that you cut in half and nail them on each corner of your raised bed.

Step 2: Assembling the raised bed

Now that you’ve cut the woods and stakes and drilled holes into the planks, it’s time to assemble the garden box.

  1. Lay down the materials you’ll use. First, arrange the cedar boards in a square shape and make sure all the pilot holes overlap each other.
  2. Using long screws, tightly screw the planks together. Make sure that everything is secure and not wobbly. If you want a more stable raised bed, use the stakes on each of the corner sides and screw it on the planks.

Step 3: Fill in the garden box

  1. Next, fill in your raised bed with your chosen nutrient-rich compost mix.
  2. Afterward, top it off with your chosen soil. Not all soils are the same, so make sure to choose one that is appropriate for your plants or vegetables. Fill the box all the way up, reaching the highest point of your cedar boards.
  3. You’ll see the soil starts to settle with constant watering. Once it settles, you can top it again with the compost of your choice.


How Tall Should the Raised Bed Be?

The most common height for raised beds is 11”, using two stacks of 2” x 6” boards. Some of the smallest beds you’ll find are around 6”, while the tallest ones are 36” high. When deciding on the height of your garden box, make sure to consider the type of plants you’re planning to put inside, since some plants have longer roots than others.

Remember that the higher your garden box is, the more pressured it will be because of the amount of soil inside. We recommend putting cross-supports on all four sides of your raised garden to ensure that it won’t burst.


If you are an avid consumer of vegetables, it may be a good idea for you to transform your backyard into a vegetable garden. This way, you will have your own source of produce and you will be able to partake in an activity that is good for your physical and mental health. To help you get started, here is a guide to turning your backyard into a vegetable garden


How Long and Wide Should the Raised Bed Be?

When deciding on how wide your raised bed should be, you must consider how you will tend to the plants in the middle of the box. We recommend a 4 feet width to ensure that you can tend to your plants in the middle of the bed without stepping inside of it.

Also, make sure to consider the location of your bed. If you put it against a fence or wall, you need to lessen the width to 2-3 feet as you won’t be able to access the other side of the bed.

In terms of length, it can be as long as you’d like, or you can build different beds for different crops. Just remember to secure your long beds with cross-sections to ensure that the cedar boards can handle the weight of the soil and growing roots.


Conclusion

Building a raised bed garden base is one of the easiest things you can do in your backyard. With the simple materials listed above and non-tedious steps, you can build a garden box in no time. Just remember to choose the proper location, wood, drainage, and irrigation to ensure that it will last for a long time.

By simply following this step-by-step guide and deciding on how long and wide your garden box will be, rest assured that you’ll have a wonderful set of raised beds in your backyard.

Recent Posts